Space and construction
This area trains turning flat shapes into things that sit in space: things you can rotate, attach to, and draw from angles no reference shows. It has four practices. Two are partial, because the source skips a step, and each one says which.
Krenz · Learning map 1 · 02:13:25“Without these two combined, they can imitate very closely, but because they can’t change the angle, because their perspective structure isn’t good enough, they end up tracing over.”
Invented figure
Build a figure from nothing in stages, using a different kind of knowledge at each one: flat pieces, then volume, then attachments, then detail. It tests several areas at once.
Krenz · Learning map 1 · 01:16:50–01:32:00 · 360p recording, so images are soft
Krenz · 01:31:38“Just drawing one figure like this, I’ve used knowledge from all directions. … What I retrieve differs at each stage.”
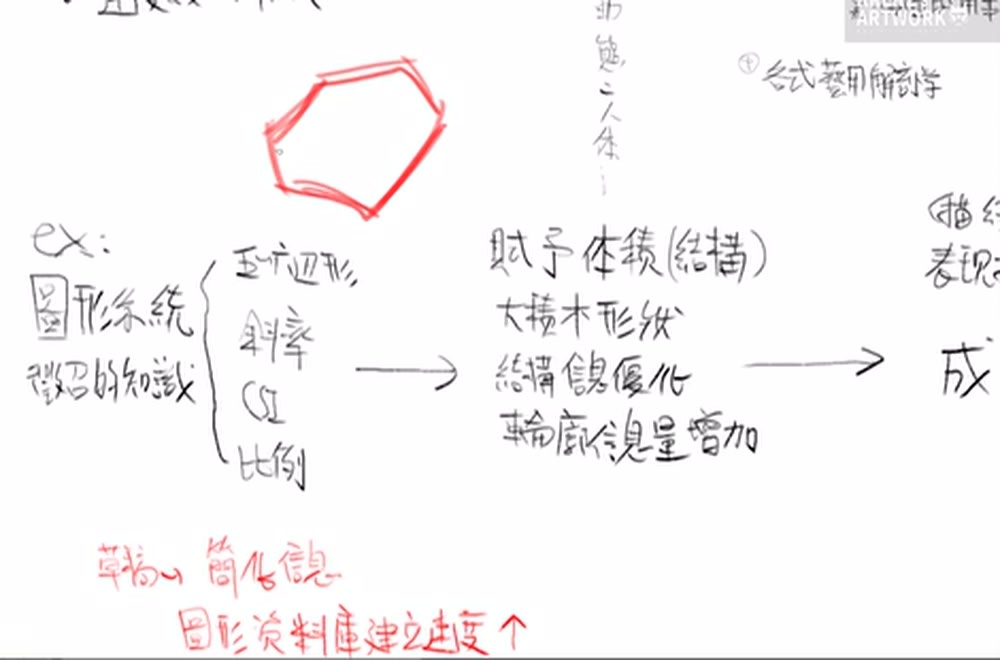
Stage 1 · Flat pieces
On a blank canvas he lays in an action figure from five- and six-sided pieces, cut with CSI lines: head, chest, pelvis, limbs. These are the Area 2 pieces. He notes that the arm uses the same shapes as the leg.
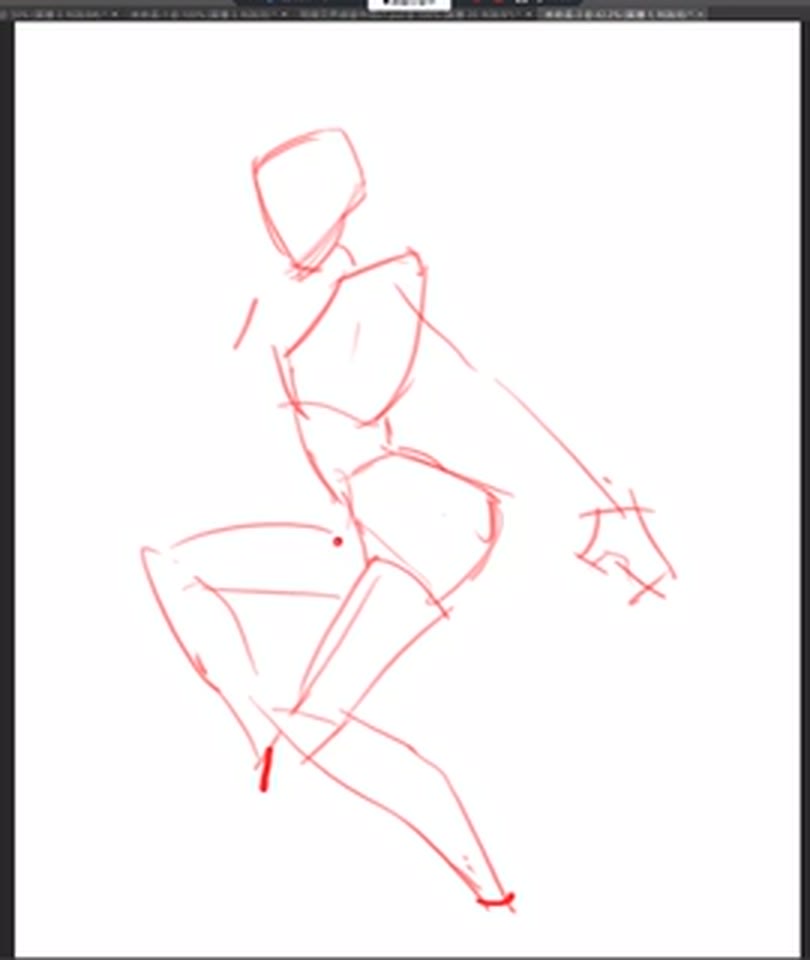
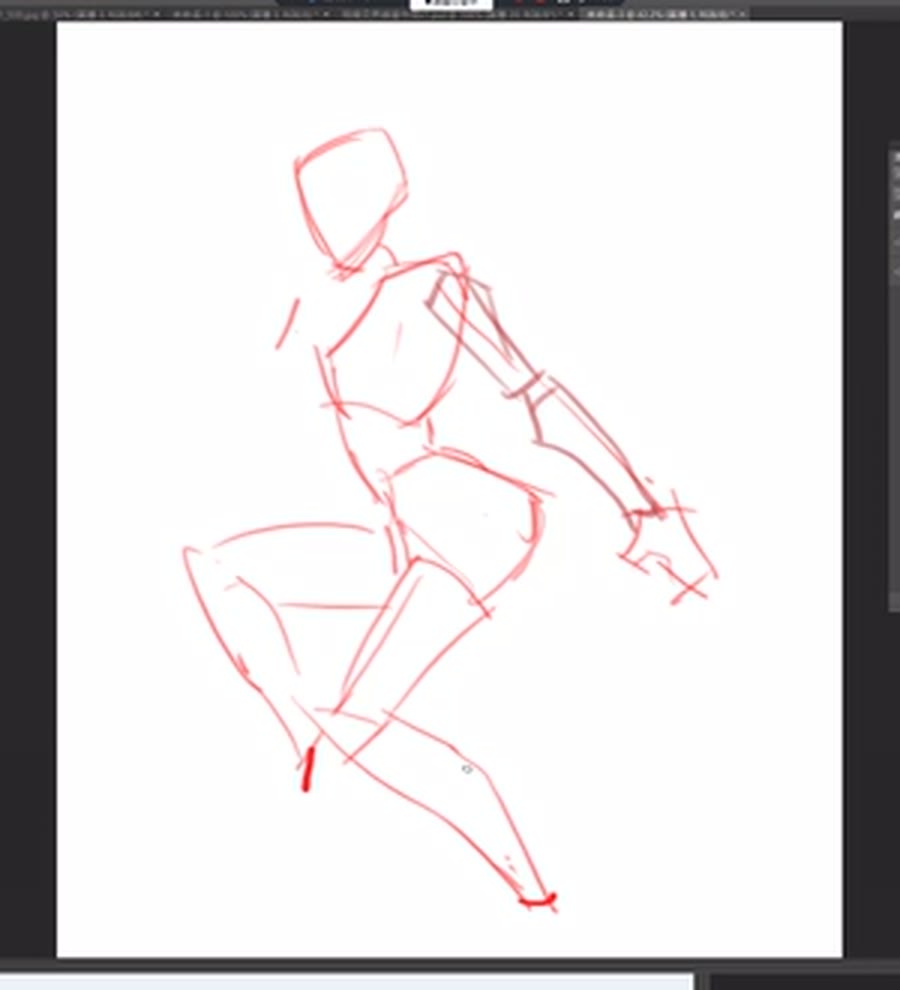
While it’s flat, he changes it freely with lasso and free transform. He leans the body back for a stronger tilt, flips a hand up, and turns and resizes the head.
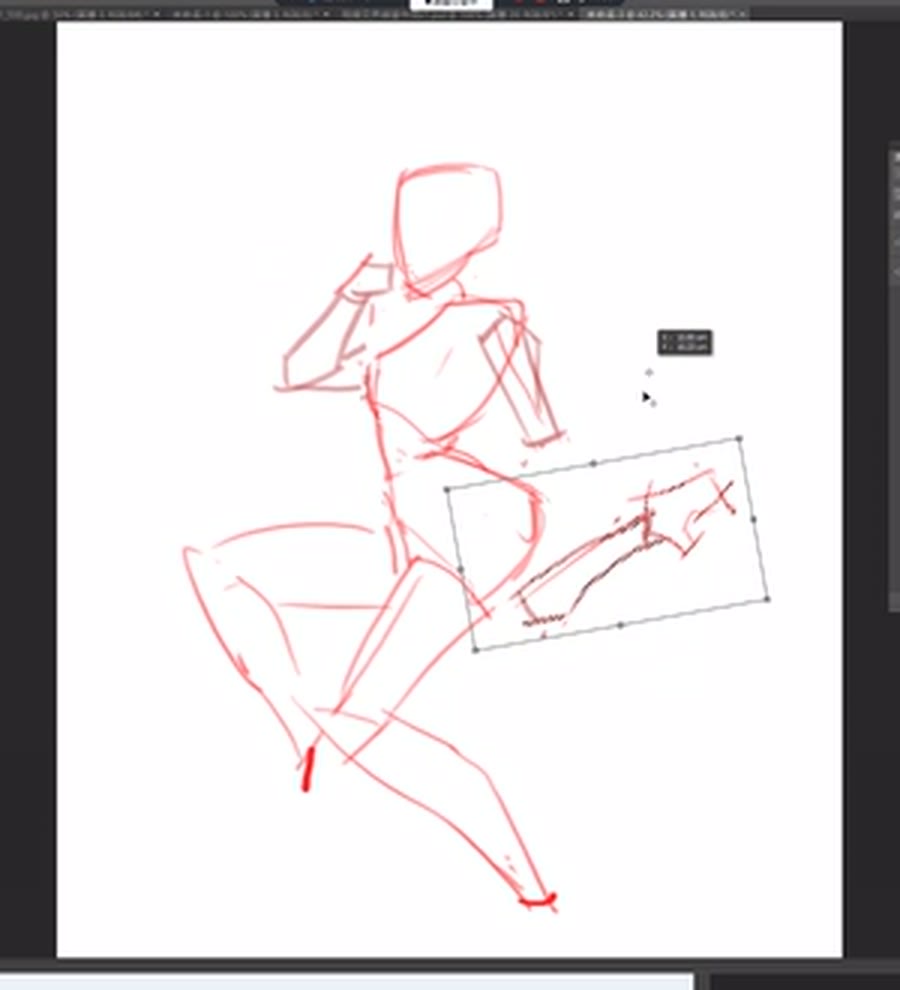
“On the computer I can very easily adjust proportions. … This stage is all silhouette. … Because no 3D structure has been given yet, it’s simple. Changing it doesn’t carry much cost. … I want its body action to tilt more, so, going by its cut blocks, I lean the body further back.”
Stage 2 · Volume
Krenz · 01:25:23“Once your basic draft shape is made, the next stage is giving it volume and big building-block shapes.”
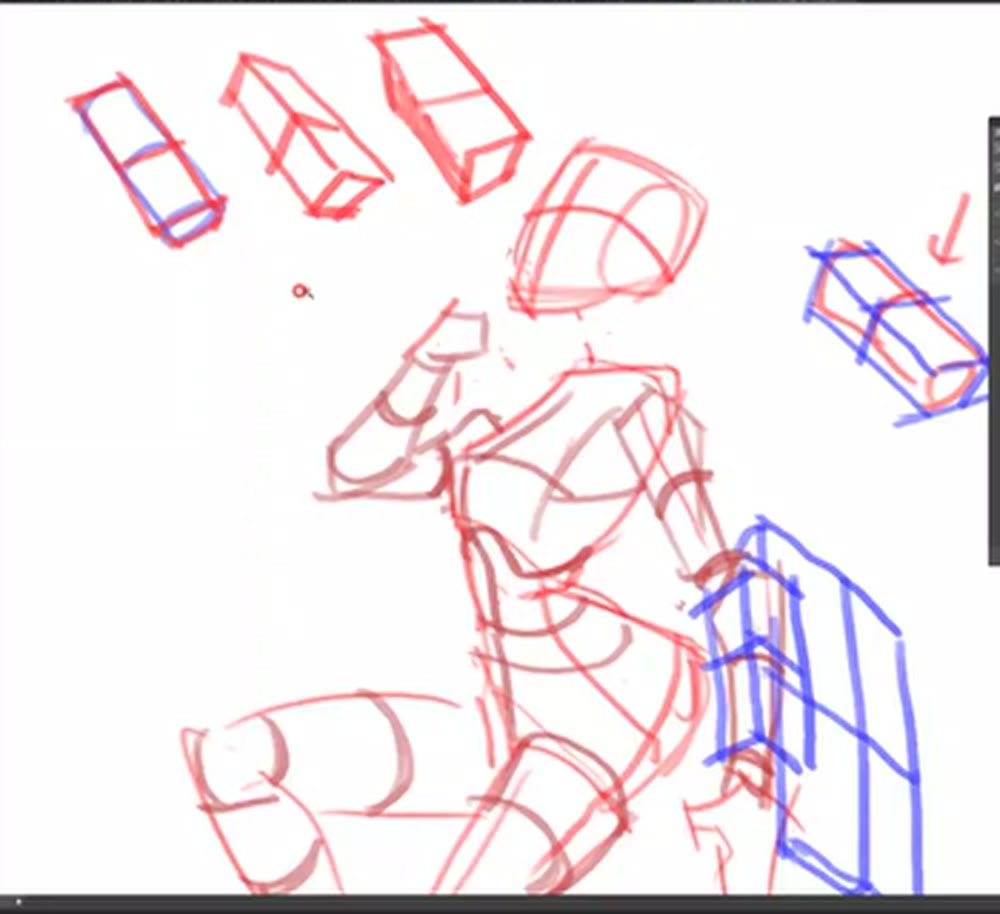
He draws cylinders over the red pieces, on the legs and arms, and it starts to read as three-dimensional.
Stage 3 · Attachments
Most people can draw a cylinder, he says. But give the arm a shield and they’re stuck, because a cylinder has no flat face to attach to. His answer is to turn that part of the cylinder into a box.
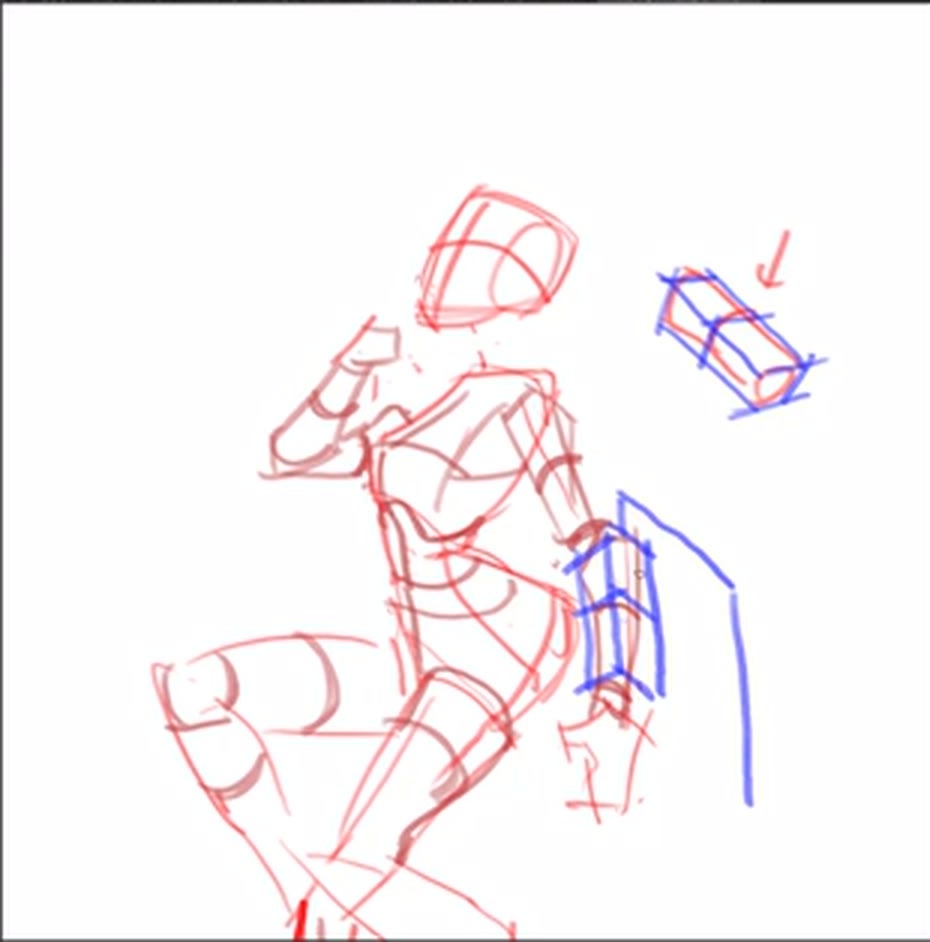
“If this person’s arm has a shield, many people don’t know how to draw it. … They never learned to turn the cylinder into a box. … Then it has two turning planes, right? With turning planes I can add something big here, like a shield, following those planes’ perspective.”
Stage 4 · Detail
In black, he adds the clavicle and chest shapes over the volumes, and mentions aligning shoulder armour to the same perspective.
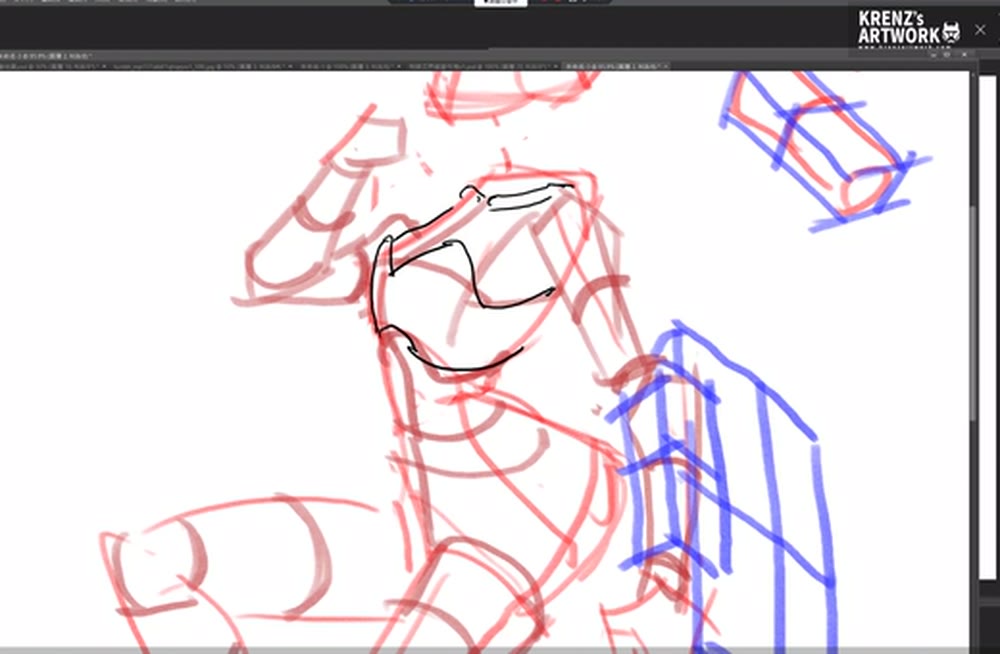
Krenz · 01:30:10“Align to perspective when drawing the shoulder armour. … The image’s information increases, the contour’s information increases with it, and it looks more and more refined.”
When you practise
Read once. Use a totally invented character. While drawing, hold his question instead of the list.
Stage 1 · Flat
- Lay in a figure from 5–6-sided pieces with straight and gently curved lines.
- Push it while it’s cheap: lasso and free transform the tilt, limbs and head size.
Stage 2 · Volume
- Draw cylinders and blocks over the pieces.
Stage 3 · Attachments
- Give it something to carry or wear. Where it attaches, turn the cylinder into a box and attach along the box’s planes.
Stage 4 · Detail
- Add anatomy, armour and costume, aligned to the structure underneath.
CheckFlat stage: “assemble the shapes correctly”, with changes within what proportion allows (01:21:42, 01:25:06). Attachments: they follow the planes’ perspective (01:27:24).
Invented figure
Flat pieces → push it → volume → box where things attach → detail.
Keep asking: what does this stage need?
Turn a pose to a new view
Rebuild a pose as simple volumes on a floor, so you can draw it from an angle your reference doesn’t show.
Krenz · Learning map 1 · 01:32:43–01:36:00, 02:09–02:13 · 360p recording
He uses the witch from Area 2, the drawing he studied and redrew from memory. Now he rebuilds her in space.
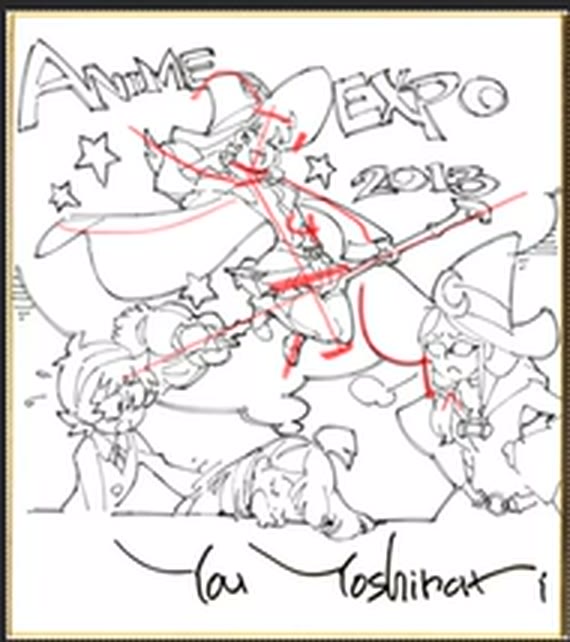
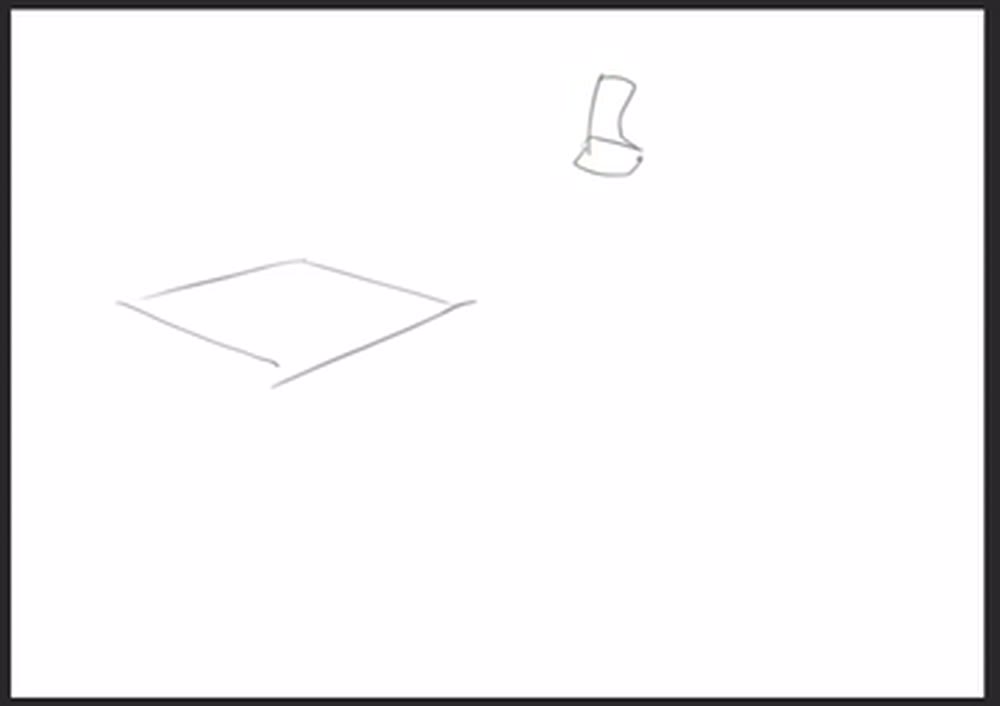
“When I practise perspective, one method is to turn the figure into three orthographic views. … In this 3D setting we re-model the figure.”
Floor, axis, volumes
A floor grid, a vertical axis rising from it, then simple volumes: a box for the torso, its shoulder plane pushed forward, a ring for the skirt, cylinders for the legs.
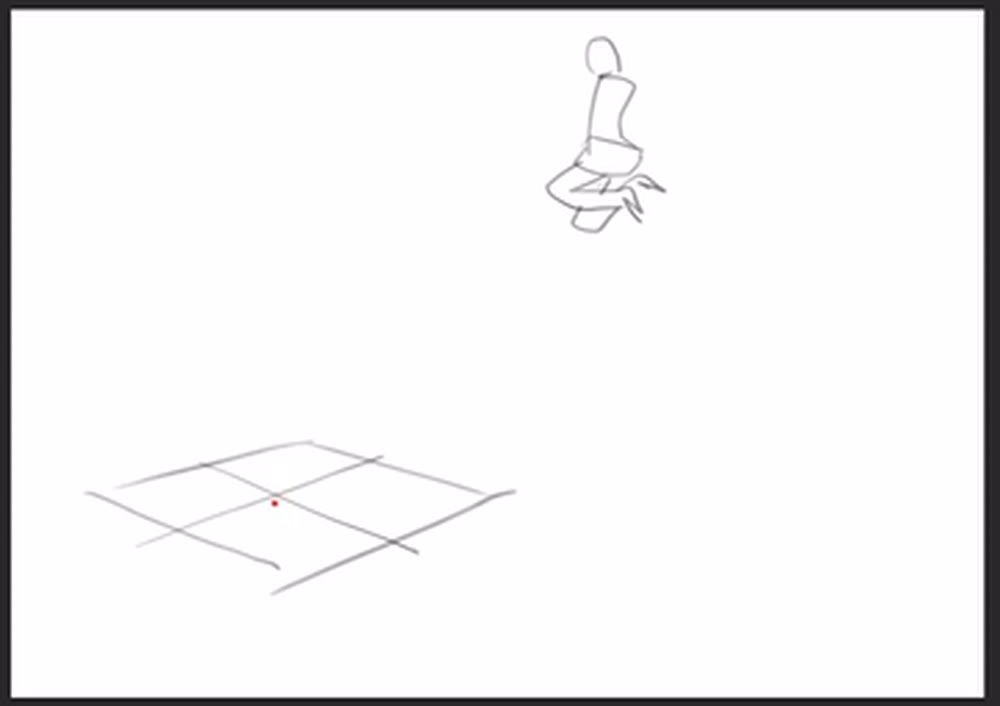
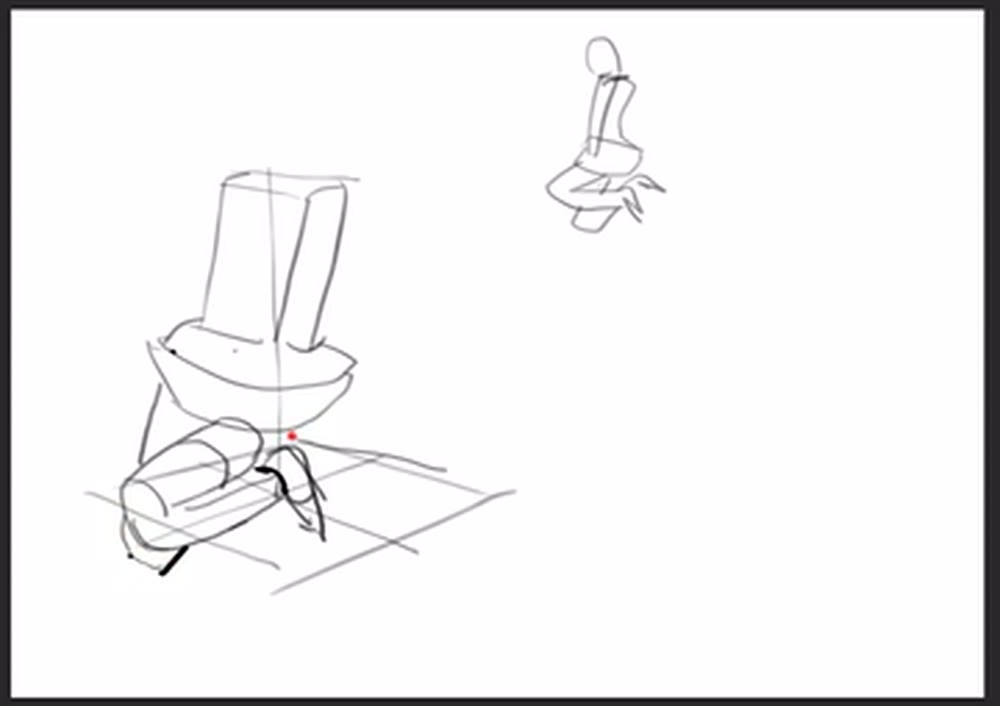
Krenz · 01:33:46“These are all horizontal axes. Here I draw the top plane of the shoulders and push it forward. Her body tilts slightly. The skirt is three-dimensional … like a hamburger.”
For the head’s tilt he doesn’t guess. He measures it against the vertical.
Krenz · 01:34:24“Her head tilts a little: how do I find it? This is the vertical axis. I pull a tilted axis, and then I know the head’s tilt is about here.”
A new floor, the same pose
He draws a second floor at a different angle and rebuilds the same volumes on it.
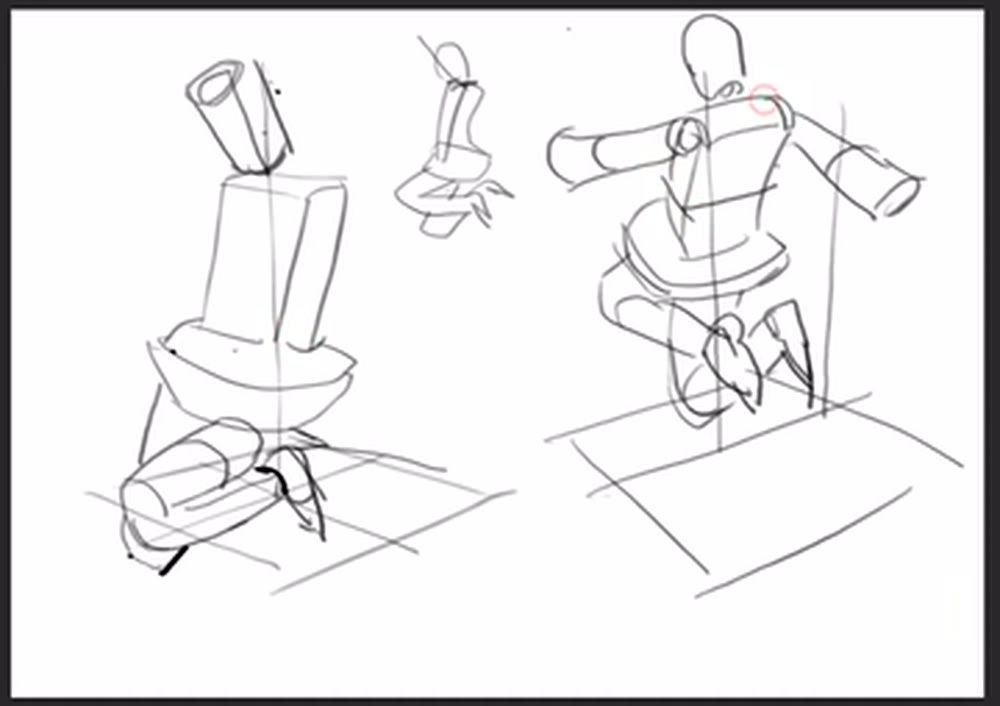
“You no longer need a reference at exactly the same angle before you can draw. With a rough pose reference, and knowing how the legs look at this angle, you can flip it yourself in your head. … This is called free rotation: you’ve built a 3D model in your head and can switch it to any angle.”
When you practise
Read once. Use your own pose reference.
- Draw a floor plane and a small simplified view of the pose.
- Raise a vertical axis from the floor.
- Rebuild the pose as simple volumes: a box torso, cylinder limbs, the head on a tilted axis.
- Draw a new floor at a different angle. Rebuild the same volumes on it.
CheckHis stated outcome: you don’t need a same-angle reference anymore (01:35:30). There’s no test beyond that.
Turn a pose
Floor → vertical → box, cylinders, head axis → new floor → rebuild.
Keep asking: where is it against the vertical?
The same object from several angles
Hold one designed object steady (its profile, thickness and symmetry) while you redraw it at another angle. It’s the spatial skill behind torsos and armour.
Krenz · Learning map 2 · 00:19–00:30 · assignment stated at 00:24:06
“This isn’t an anatomy problem”
Students ask him how to train anatomy. He answers by drawing an object: a slab like a pillow with a dent in the middle and two grooves along the top.
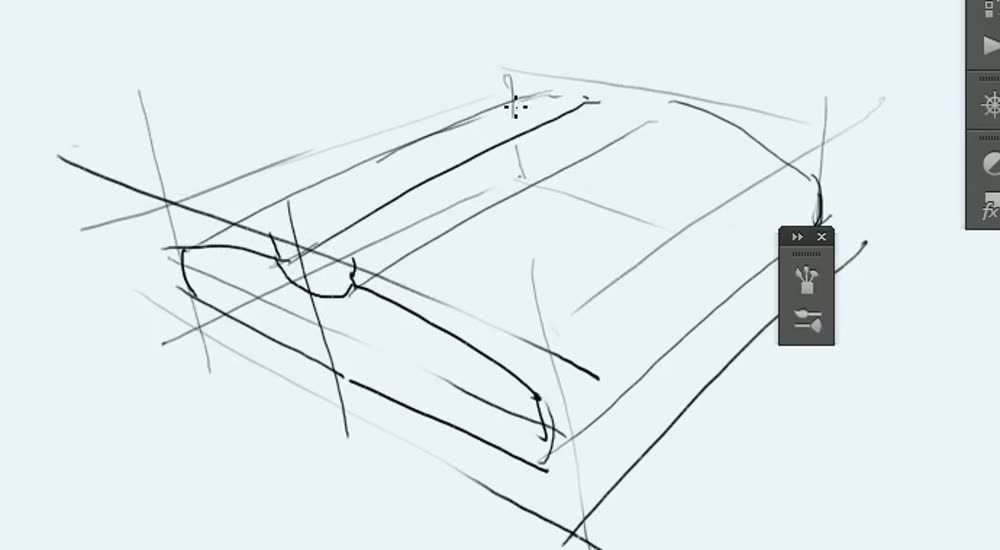
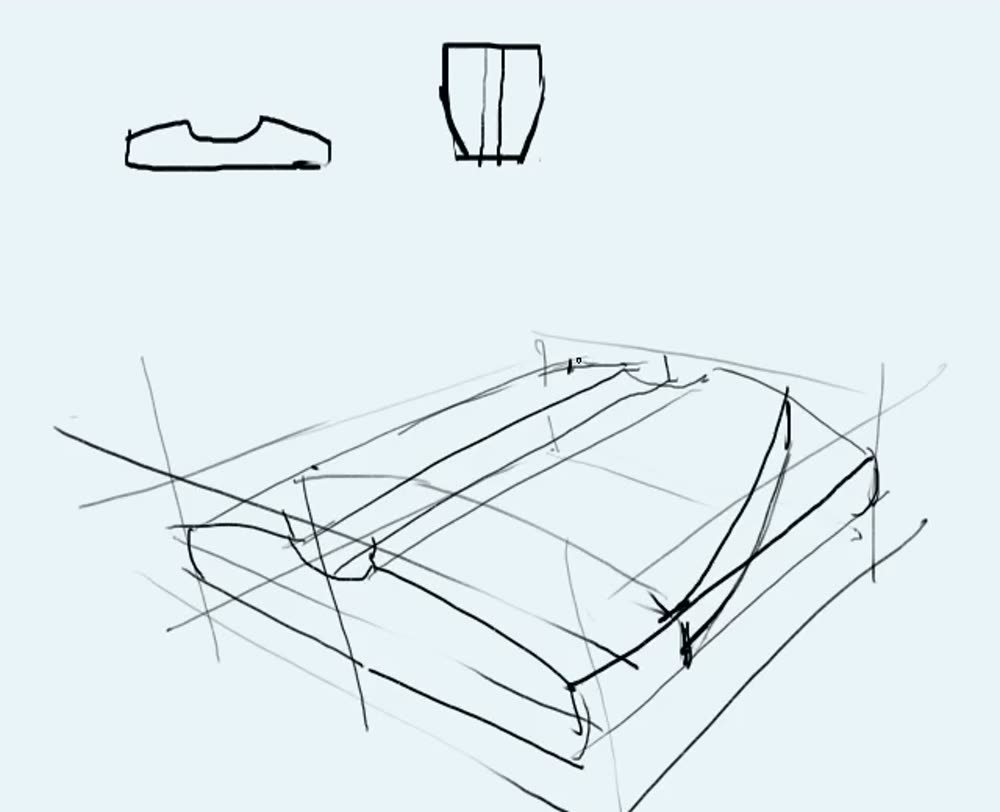
Then he changes it. He cuts one side inward, catches how far it goes, and matches the other side. Now it’s shaped like a shield.
“If I take this object and cut it in from the inside like this, what will it turn into? … You have to catch how far it cuts in, and on the other side we find the symmetrical one.”
Krenz · 00:24:08“We have a training where you must be able to draw objects from all angles: the same object, from all its angles.”
Upright, it becomes a torso
He redraws the shield standing upright, laying perspective lines the same way. He adds plates and a cylinder on top and fills it with colour so it reads. Now it’s a torso block.
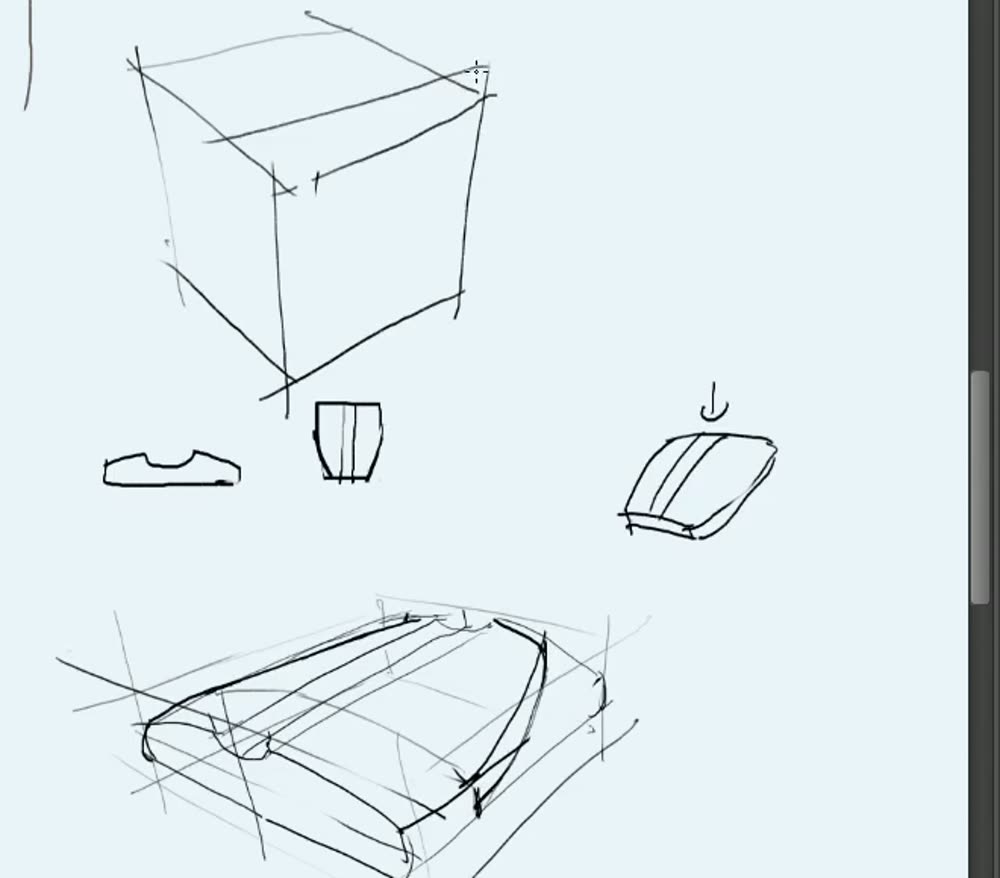
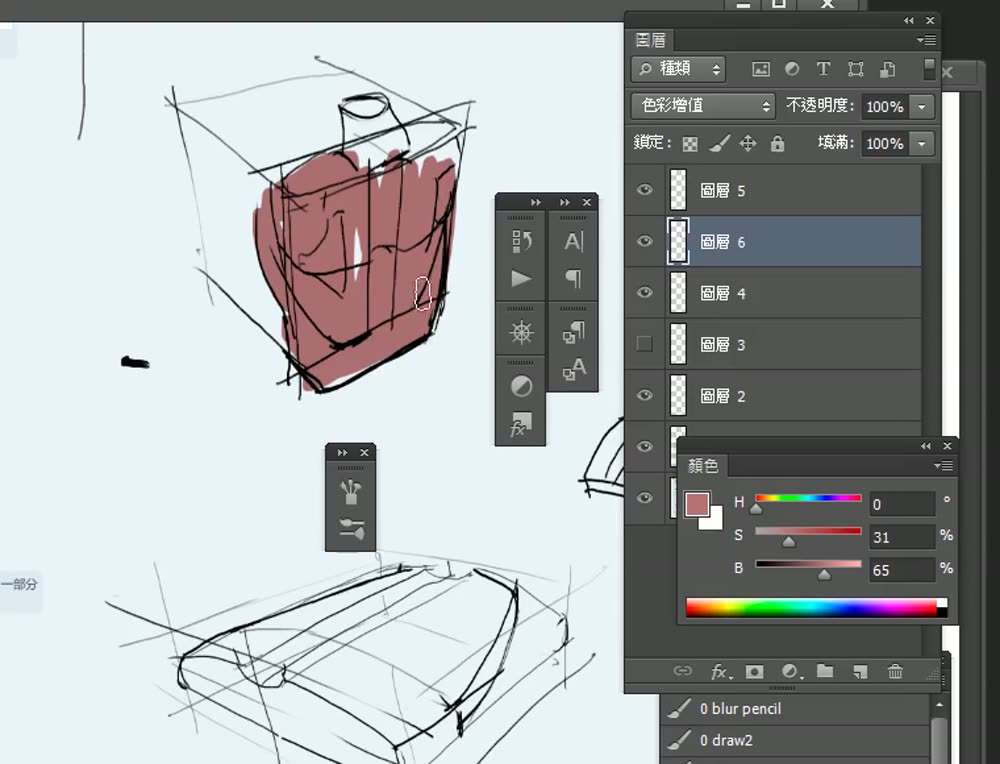
Krenz · 00:25:47“These are symmetrical. Drawing them to standard in perspective is quite hard. This is a human torso block.”
Next comes a handlebar-like bar with its X, Y and Z axes drawn through the centre. Joined to the block, it reads as the chest and clavicles.
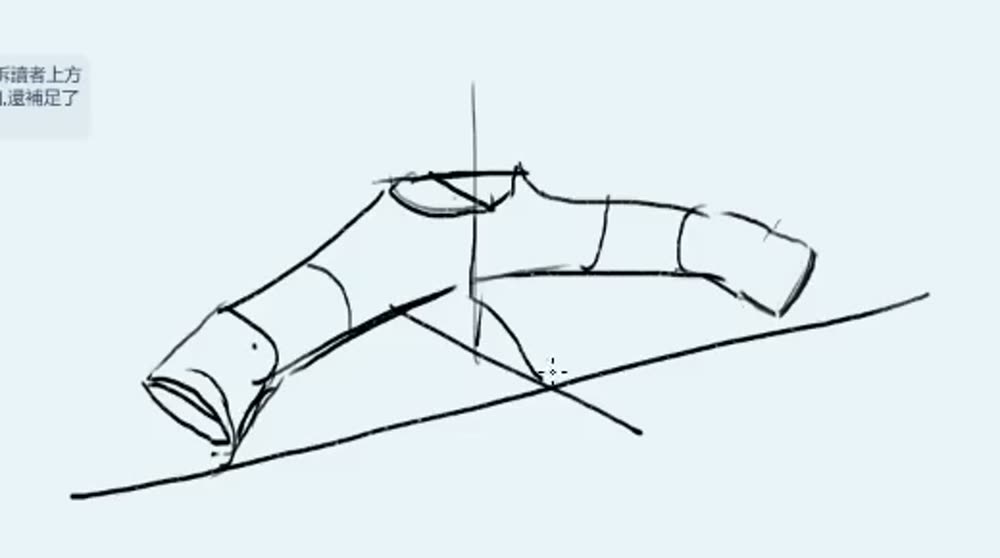
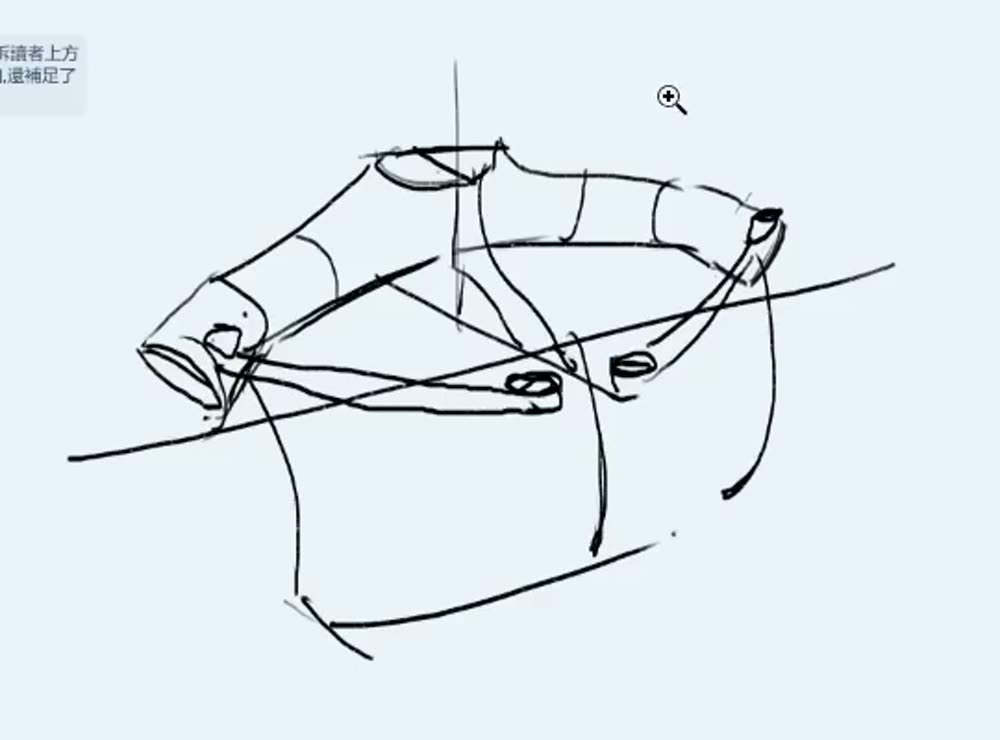
“You need to be able to draw this and also know its XYZ in perspective. Only then can you be aware of where its 3D structure should go. … This calculation isn’t an anatomy problem. Many think it is, but really it’s whether you can draw a precisely left-right symmetrical aircraft or warship.”
When you practise
- Draw a simple shaped object in perspective, with real thickness and a feature or two such as a groove or dent.
- Change it symmetrically: cut one side in, then match the other.
- Redraw the same object at a new angle, upright for example. Keep its profile, thickness and symmetry.
- Add attached parts, knowing each part’s X, Y and Z.
CheckThe standards he names: symmetry held in perspective, knowing the object’s XYZ, straight clean lines (00:25:30, 00:26:18, 00:20:37).
Same object, new angle
Shaped object → change it symmetrically → redraw at a new angle → attach parts.
Keep asking: do I know its X, Y and Z?
A scene through its perspective
Study a crowded illustration by rebuilding its space first, so you aren’t copying hundreds of unrelated lines.
Krenz · Shape lecture · 02:06:29–02:21:37
On his difficulty ladder this is a hurdle: “illustration with a perspective setting”. Without perspective, every line needs its own observation and there’s no way in.
Krenz · 02:08:55“You have to rely on observation for every line, and doesn’t every line get complicated? … You can’t find the rule of the whole image, can you?”
He rejects his first choice of image as too busy and picks a Kim Jung Gi kitchen scene.
Five lines first
He traces the main perspective directions in red over the reference, including a vertical. Then he rebuilds those few lines on the blank side.
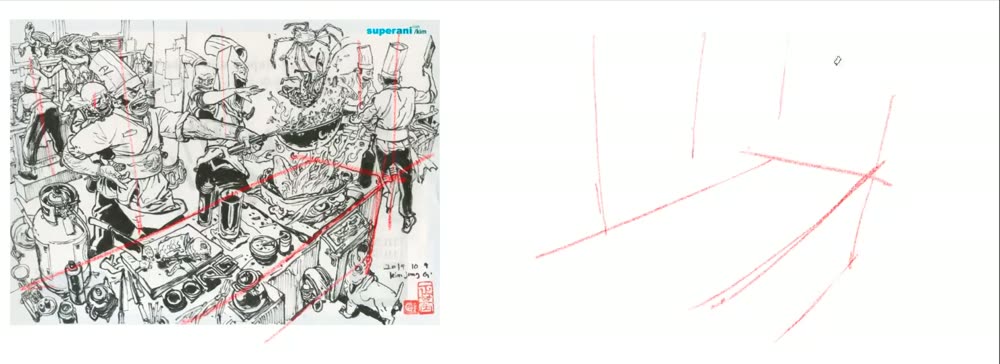
“The fourth, the one representing the vertical axis, is very important. Once this is out, everything after is much simpler. … With your understanding of perspective you can complete parts you can’t see. Even hard-to-observe places, you don’t need to observe. You can just draw the perspective.”
Place, then cut big to small
He marks where the people stand, draws the counter, and puts up vertical “pillars” for the figures. Then he cuts big to small.
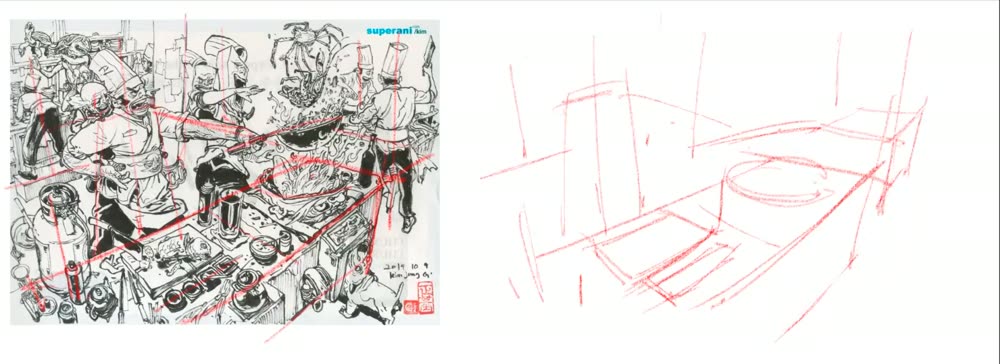
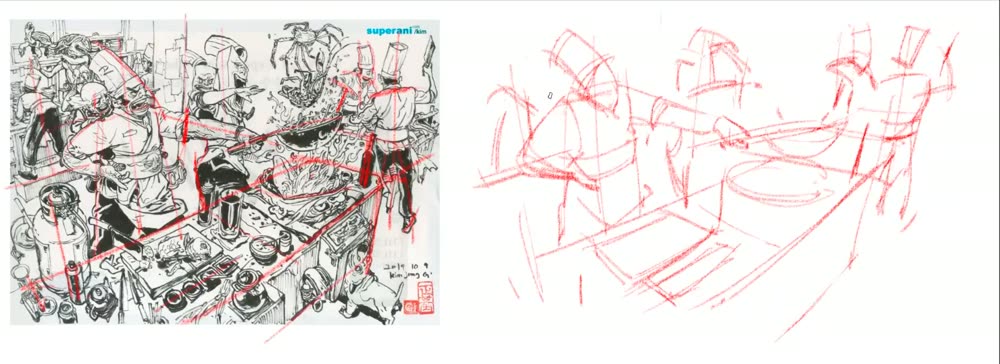
Krenz · 02:12:59“With this kind of task I won’t require complete accuracy. Accurate is best, of course. If you can’t be, go by your own perspective. The main thing is that your perspective is right.”
The demo stops unfinished. For the standard, he shows his own older Kim Jung Gi studies, about 45 minutes each.
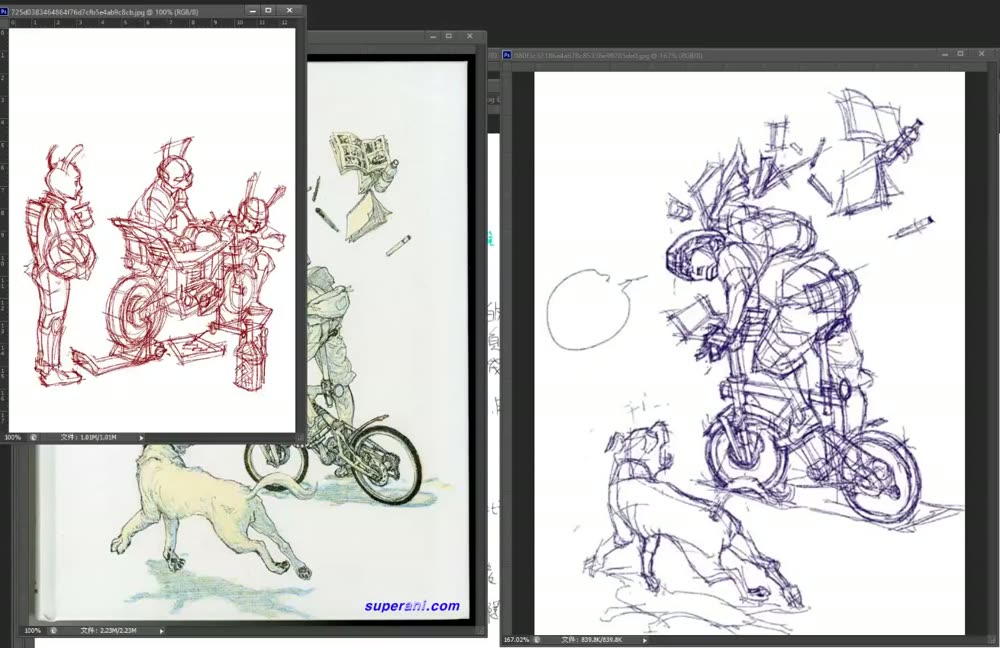
Krenz · 02:13:43“Don’t draw straight from photos; they have too much in them. You have to actively distil them into lines.”
When you practise
- Pick a line-art illustration with a clear setting: tables, rooms, streets. Not a photo.
- Trace about five main directions on the reference, including the vertical.
- Rebuild those lines beside it. Mark where the figures and objects stand.
- Cut big to small. Where your space and the reference disagree, go with your space.
Check“The main thing is that your perspective is right.” The positions must be right too (02:13:08, 02:16:39).
Scene through perspective
Five lines incl. vertical → rebuild → place → big to small.
Keep asking: is my perspective right?