Light and value shapes
This area trains seeing light and shadow as flat shapes, each with one value, before any softness goes in. It has two practices and no colour.
Krenz · Recombination lecture · 1:04:16“It combines an understanding of shape with an understanding of what we call value.”
Folds as flat value shapes
Learn the shapes folds make by judging two things separately: the shape of each light or dark area, and its value. Softness goes in last.
Krenz · Recombination lecture 1:03:40–1:27:15 · Photoshop throughout
Why it matters
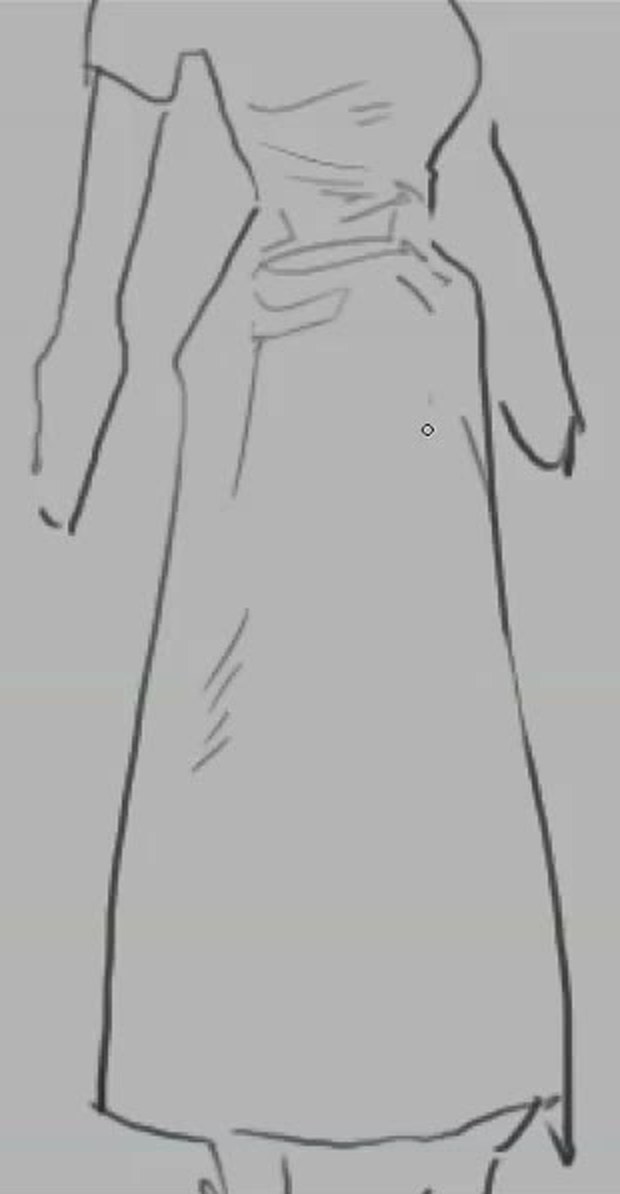
Collars, belts and panels give a garment internal shapes. A plain dress has none of that. Krenz’s answer is light and shadow.
Krenz · 1:10:33“If you have no cuts to use and can’t draw other objects, you have to learn to use the shapes of light and shadow, or these marks and lines, to make what was only a silhouette look rich.”
The study that goes wrong
He recreates a typical student attempt at a bent arm in a white sleeve. The student copies every small light and dark patch and hatches it all evenly. The result is a tangle: there’s light and dark, but no idea what to do next. A second layer of hatching doesn’t help.
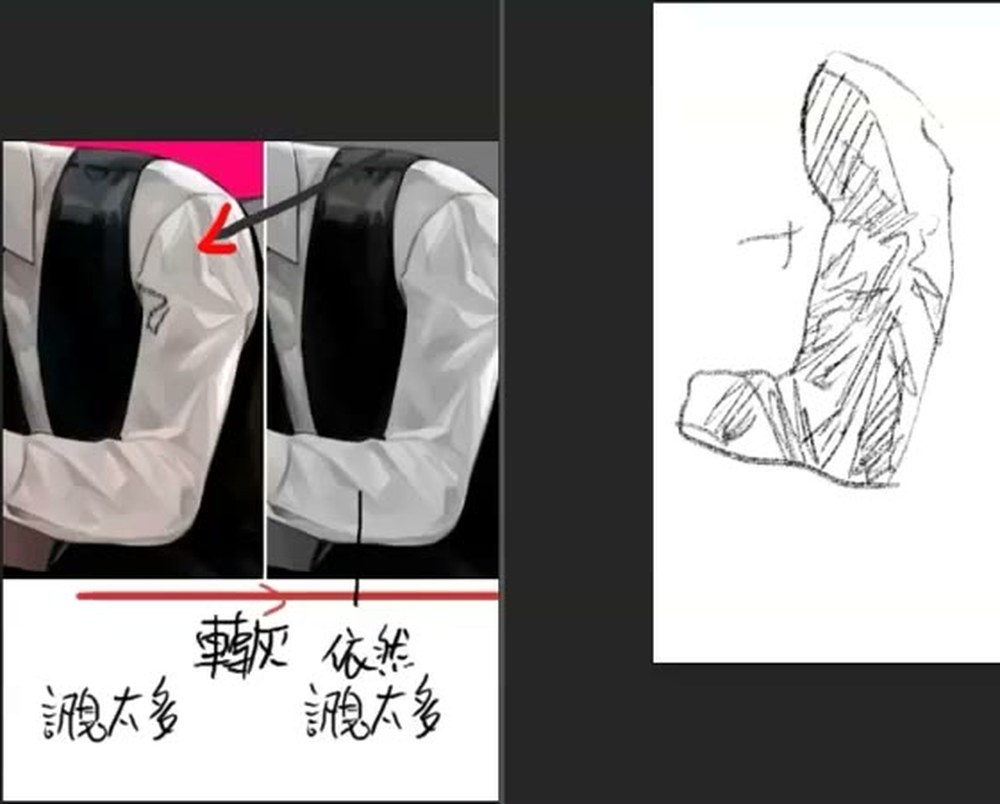
Krenz · 1:12:56“That’s too much information. Students usually can’t digest it all. … So what you need to learn is to reduce choices, reduce information, and look under constraints.”
Reduce the choices
Greyscale first. Then Photoshop’s Posterize, set to five or six levels. Every area becomes one solid patch: no gradients, no transitions, no pen pressure. That splits one hard problem into two easier ones.
Krenz · 1:14:28“When you’re learning light and shadow, the elements get split out. First, judging the shapes of light and dark. Second, judging the light and dark values.”
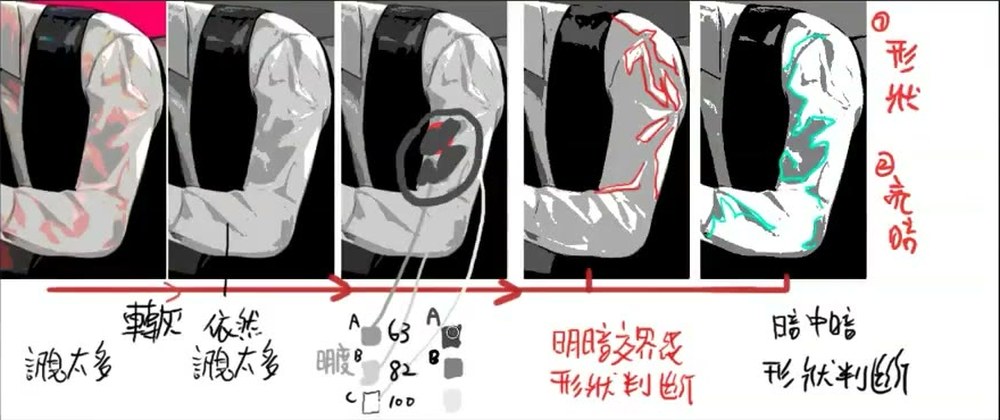
Krenz · 1:15:35“Now we can check. While learning, you can tell them whether they got the shape right, or the value right.”
The two shapes to find
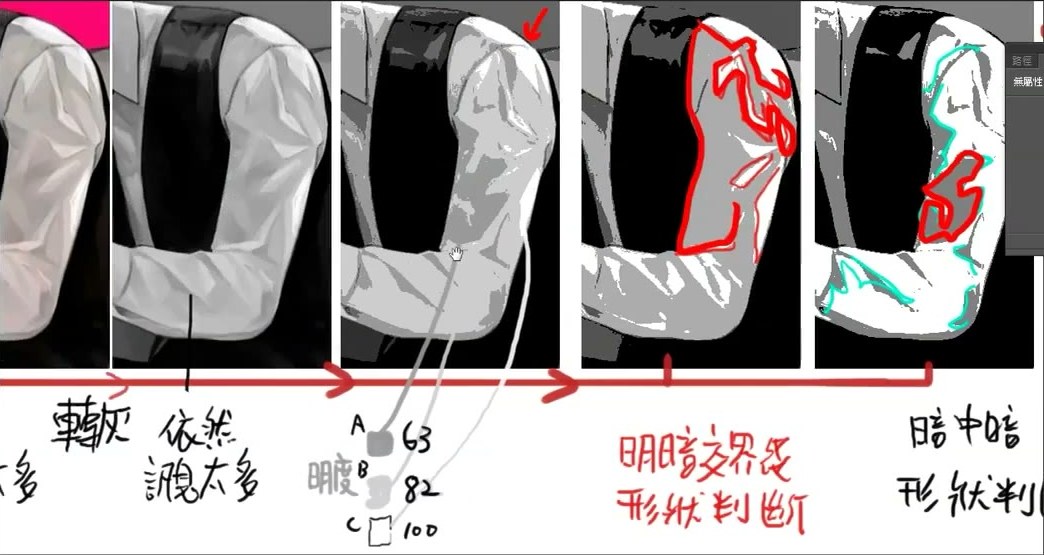
Krenz · 1:16:59“You observe two main things: the shape of the light block, and, inside the dark block, which parts are darker blocks within it. That’s what we usually call dark-within-dark.”
Softness goes back in last
The second common failure is going straight for the painted look with a blurry brush and ending up with mud. Krenz organises the flat shapes first, then paints a few soft joins between them.
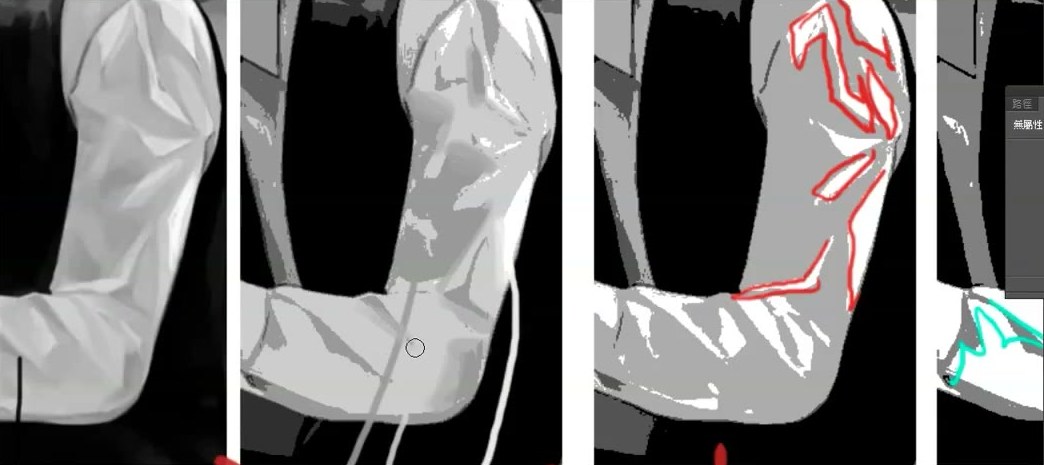
Krenz · 1:17:47“So you organise it first, and only then add these gradients back.”
On his own skirt
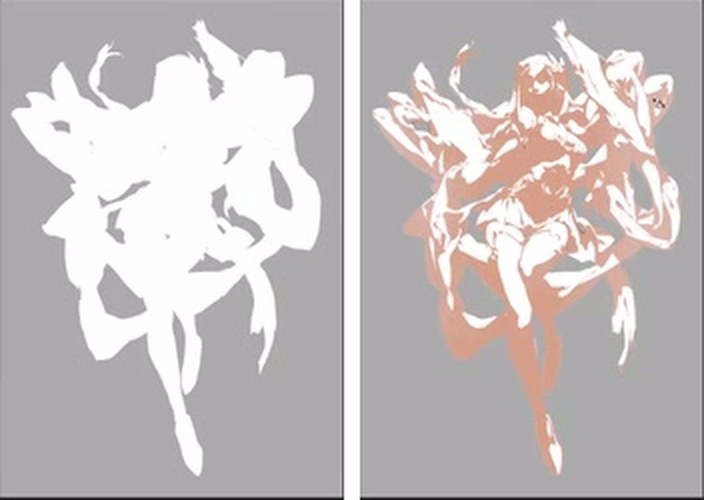
He moves the method to the skirt in his own ballet illustration. Greyscale, “maybe” a bit more contrast, then Posterize at five levels. Beside it is an empty flat silhouette of the skirt.
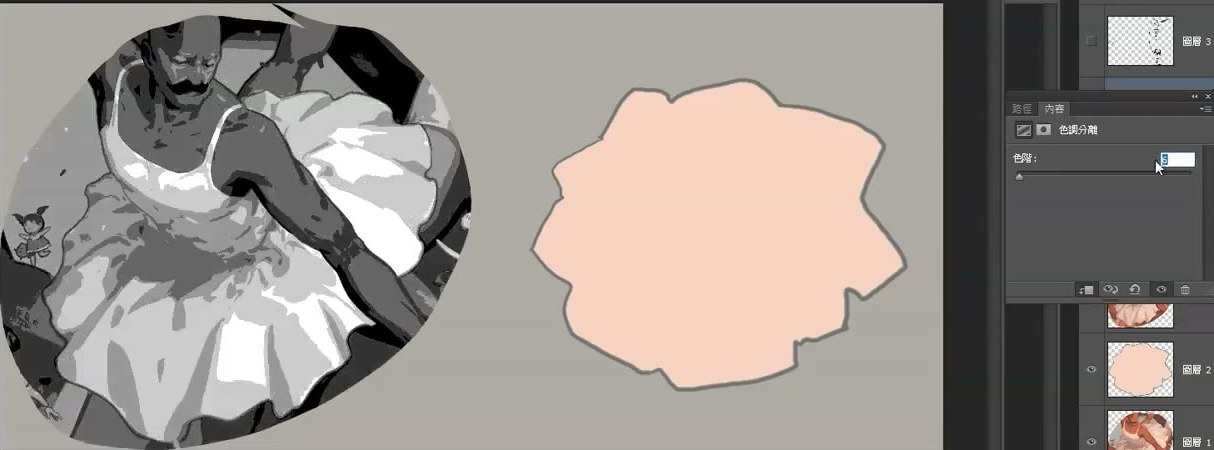
He paints the shadow shape with a 100% opaque brush. Then he checks the value, catches his own mistake and lightens the whole shadow layer. On screen the lightening is a Hue/Saturation adjustment, lightness +24.
Krenz · 1:19:25“Use a straight 100% brush and get this shape right. … And the value has to be right too. Like this, I’ve painted it too dark.”
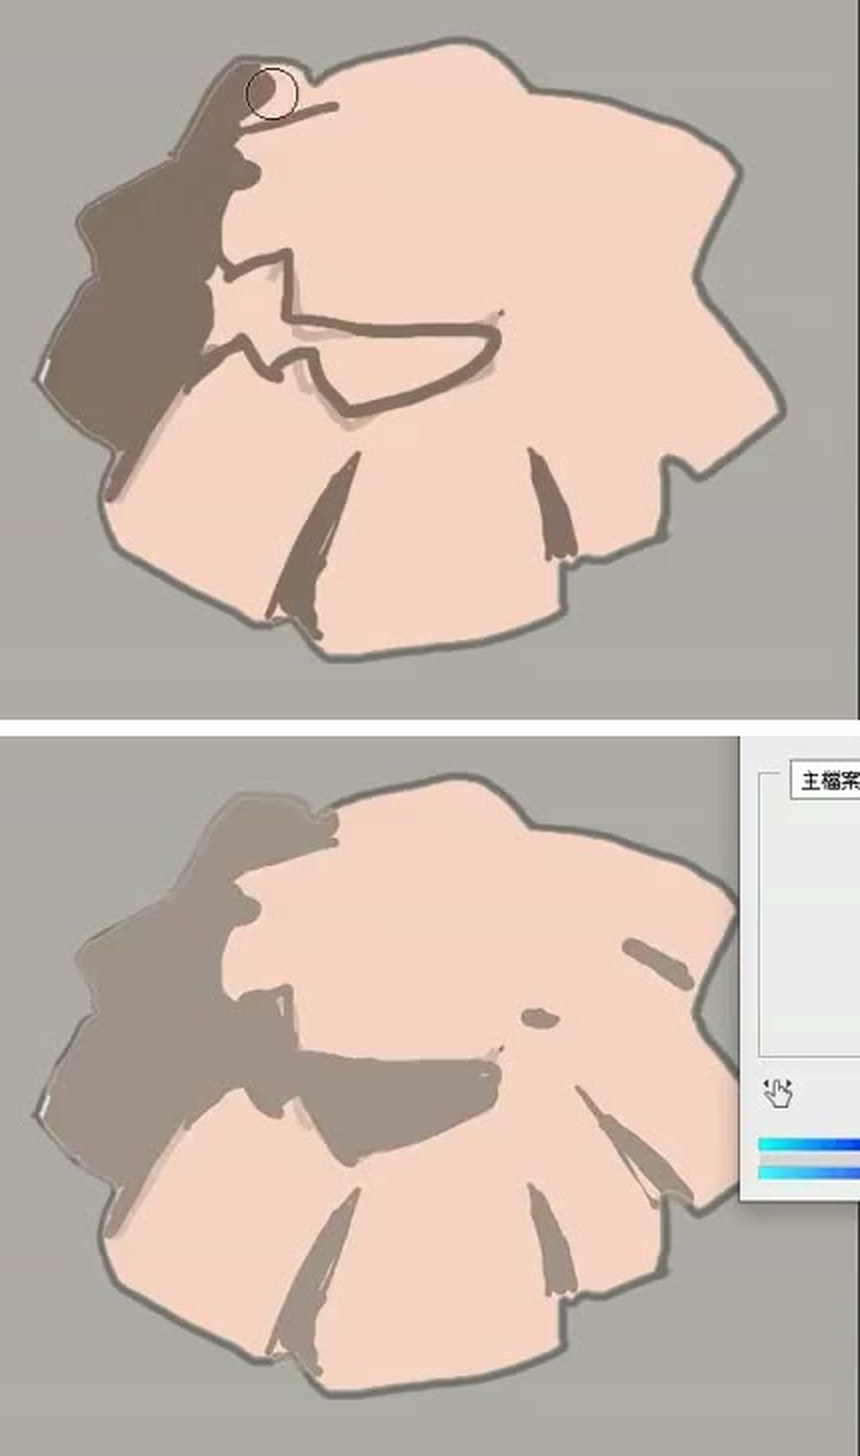
Only then does he add the darker shapes inside the shadow.
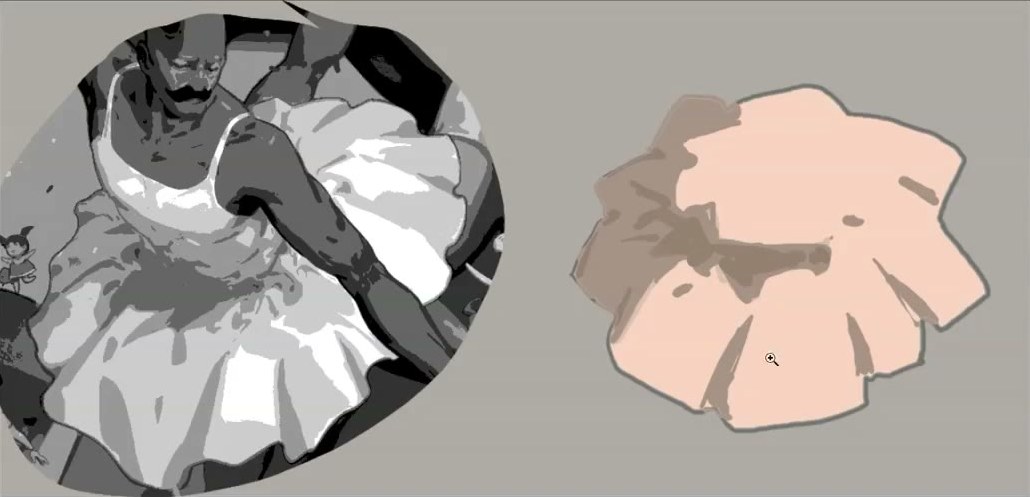
Krenz · 1:20:20“Draw them enough and you roughly learn the rules of how they look. … Half is shapes real folds could make. The other half is the viewer’s eye completing details for me. I only need to get to about 70%.”
The next step: small differences inside the groups
Once the flat version reads, he varies the values inside the big groups very slightly. He compares it to piano keys: every other plane is nudged a little lighter or darker. For a reflected light, he paints with the value of the neighbouring plane so the change stays very weak.
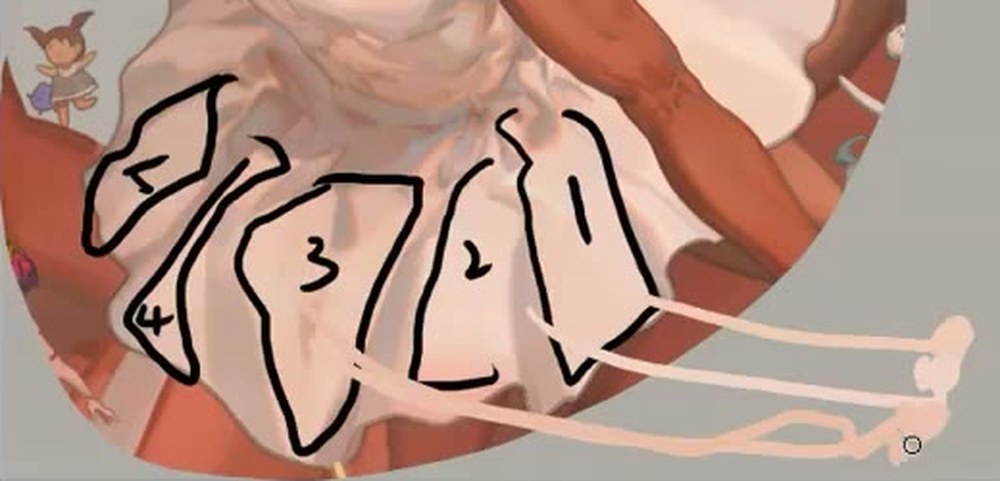
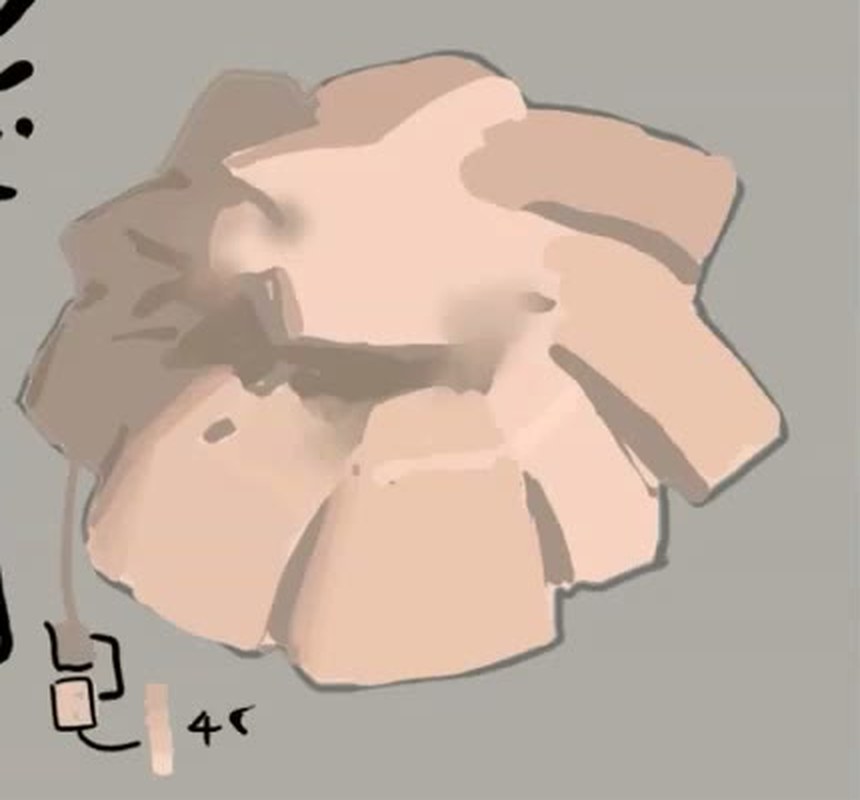
Krenz · 1:24:15“As long as there’s this darker area in between as a decoy, people can’t tell. They’ll think I used one value. So first, you have to understand shape. Second, value: you need to be very familiar with how the values change.”
When you practise
Read once. While painting, hold his question instead of the list.
Part 1 · Reduce
- Pick a fold reference: a sleeve, a skirt, any cloth.
- Convert it to greyscale. Posterize to five or six levels.
Part 2 · Flat shapes
- With a 100% opaque brush, paint the big light shape and the big dark shape.
- Check the values against the posterized reference. Fix the value of an area if it’s off.
- Add the darker shapes inside the shadow.
Check“Did they get the shape right, or the value right?” (Krenz, 1:15:35)
Part 3 · Soften
- Put back selected transitions between the flat shapes. Not all of them.
Later, once the flat version comes easily
- Nudge values inside the big groups very slightly, piano-key style.
Folds as flat value shapes
Grey → posterize → opaque flat shapes → soften a few joins.
Keep asking: is it the shape or the value that’s wrong?
Light and shadow in black and white
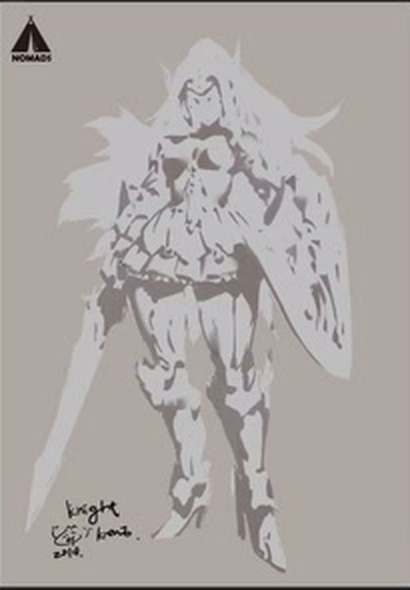
State the boundary between light and shadow decisively, so light and dark alone describe the form without the line art’s help.
Krenz · Learning map 1 · 1:36–1:52 · this recording is 360p, so the images are soft
Where it sits
He puts it as the second stage of drawing study, after shape accuracy, and makes shape capture its prerequisite.
“The second stage includes something called light/shadow boundary accuracy. … If I want an accurate light/shadow boundary, what needs practising? First of all, pure shape capture.”
Pick a photo with clear light
Soft, diffuse light makes faces and folds blur together, and that’s where beginners go wrong. They pick a soft-lit photo, paint with a soft brush, and get mush.
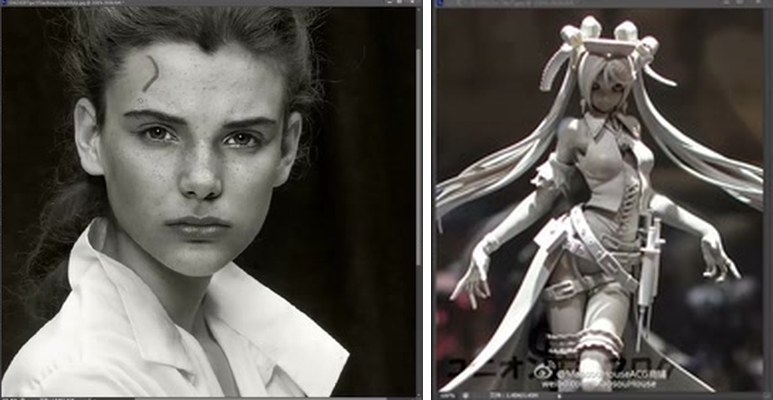
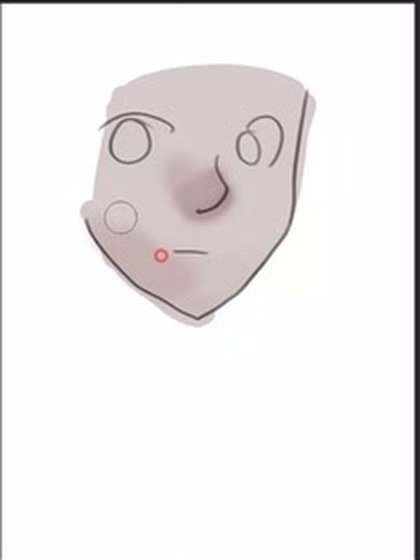
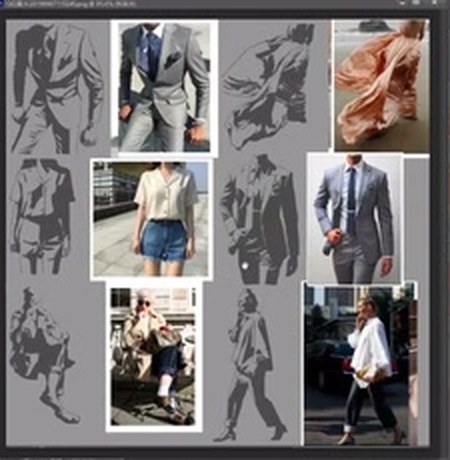
“Most beginners don’t dare to properly state the edge, the light/shadow boundary, in one go with a clear block. … What photo should you look at first? This kind, where the boundary is clear and light and dark are clear, so you can see the light and dark areas at a glance.”
The assignment
Krenz · 1:45:59“In the first class I have them do this: a light/shadow boundary extraction exercise. Look at a photo and extract the boundary. Remember: only black and white, only two layers, light and dark. Pull out the lit side and the shadow side.”
His own check
Krenz · 1:45:37“My requirement for myself: when I turn the base of this layer white, so it’s just a silhouette, I must still be able to make the reader understand what I’m drawing using only light and dark.”
Line art hides missing decisions
He draws line art first, to capture the shape. Then he turns it very faint, because lines can stand in for shadow that isn’t there. On a face, the nose has no shadow at all, yet with the lines on it “looks OK”. On a figure, students leave out the boundary where the skirt meets the thigh, because a line already separates them.
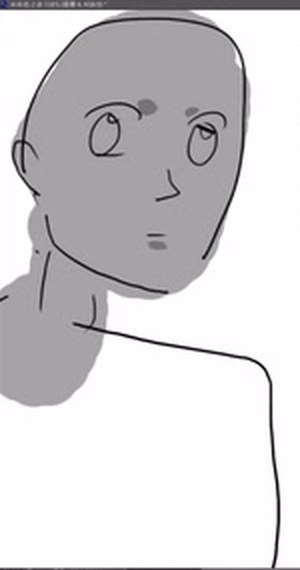
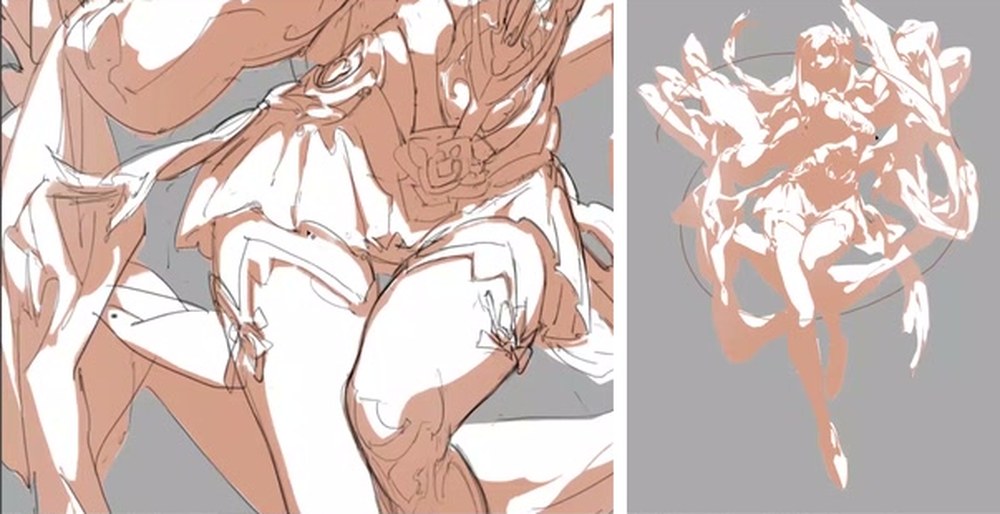
Krenz · 1:48:32“You’ve used the line art to replace doing the light and shadow. … So I make the line art very faint, and even turn the base white, to see whether I’ve established enough of a boundary.”
Cut big
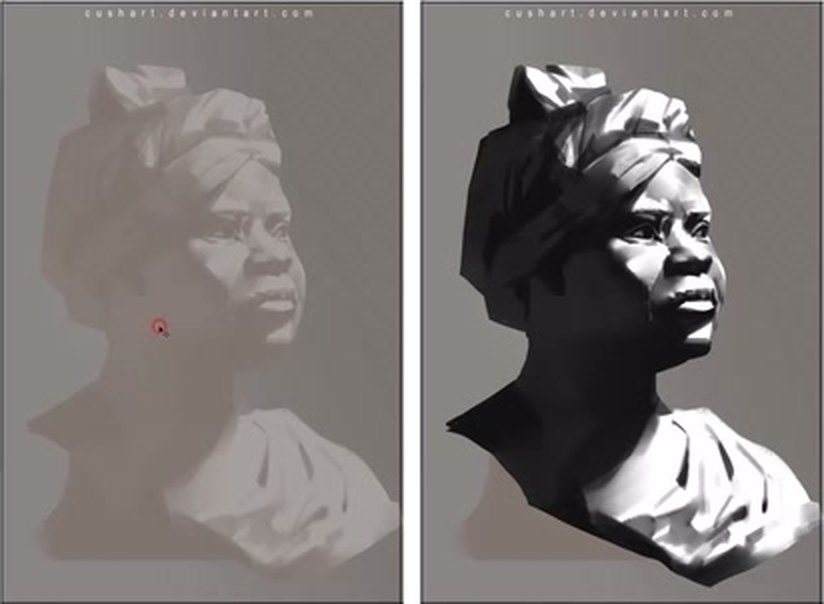
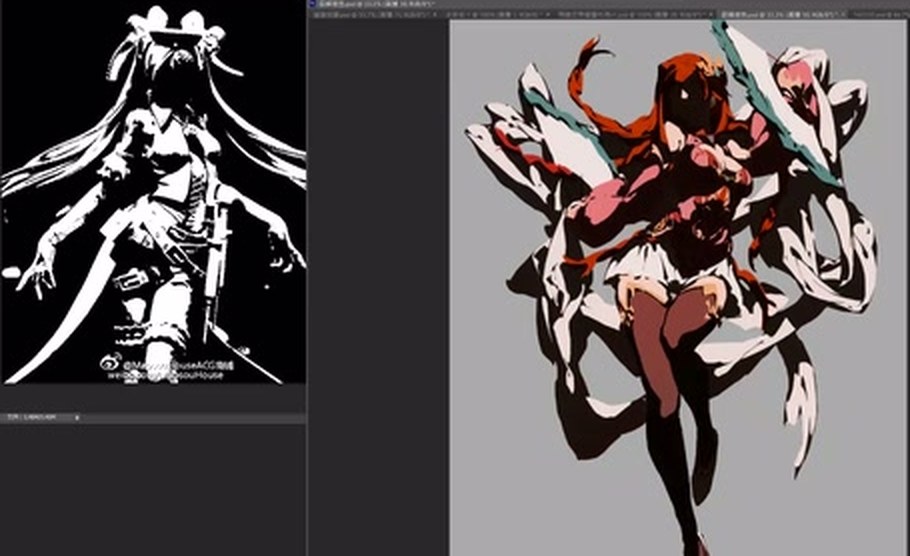
Krenz · 1:51:44“You’ll notice the shapes I cut inside are close to CSI: big planes, done in one go, not cut into fragments. You have to cut big.”
When you practise
Read once. While painting, hold his question instead of the list.
- Pick a photo with clear, direct light. Statue and sculpture photos work well.
- Line art first, if you want it, to capture the shape.
- Two values only: fill the lit side and the shadow side. Cut big planes, not fragments.
- Turn the line art very faint and the base white.
- Wherever a form disappears, look at the photo and fix that boundary.
Check“Have I established enough of a boundary?” Can the reader understand it from light and dark alone? (Krenz, 1:45:37, 1:48:46)
Light and shadow in B&W
Clear-light photo → two values → cut big → fade lines, white base.
Keep asking: can light and dark alone carry it?