Inventing and designing
This area trains making your own simplification instead of borrowing someone else’s. It has five practices: four short ones and a longer character-design assignment.
Krenz · Shape lecture · 01:08:51“Those of us who came up through anime often lack experience of actively simplifying. … Say I’ve drawn an anime girl and I tell you to put an eagle beside her. They’ll find an eagle photo and directly imitate its whole realistic form. They can’t turn the eagle into a chibi version, or an eagle in their own personal style.”
Fit a subject to a shape
Start with a shape, then make a subject fit it. The shape forces you to distort proportions and invent your own way of drawing the subject.
Krenz · Shape lecture · 01:08:45–01:14:51
Before the assignment, he does the eagle himself: a few angular strokes perched on the girl’s hand, no feathers. Then a smaller bird.
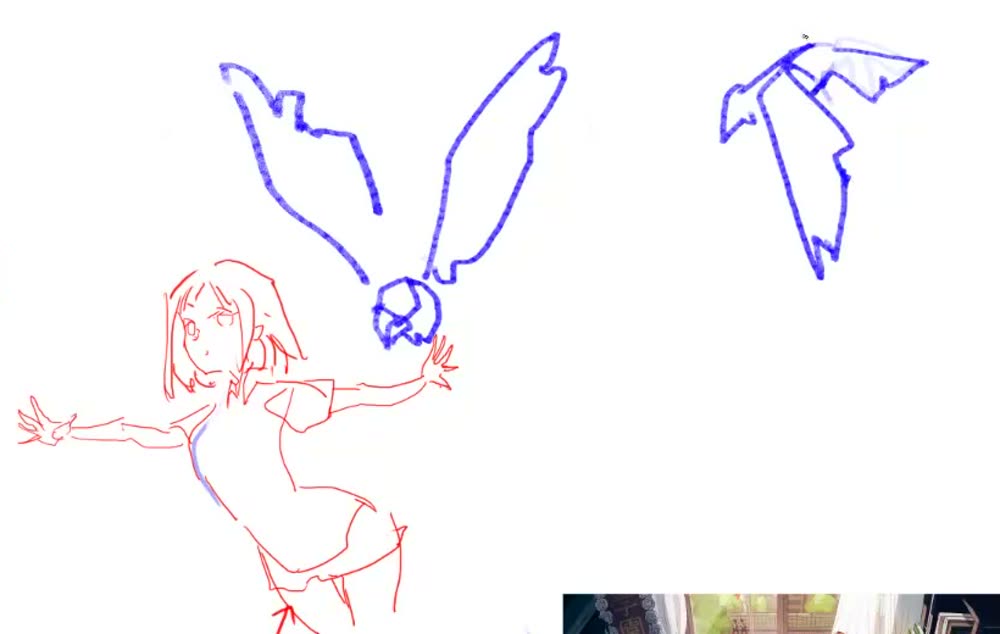
Krenz · 01:10:06“I simplify it into a shape, but I’ve taken the realistic concept and rearranged it, recombined it into a symbol of my own.”
His teacher’s assignment
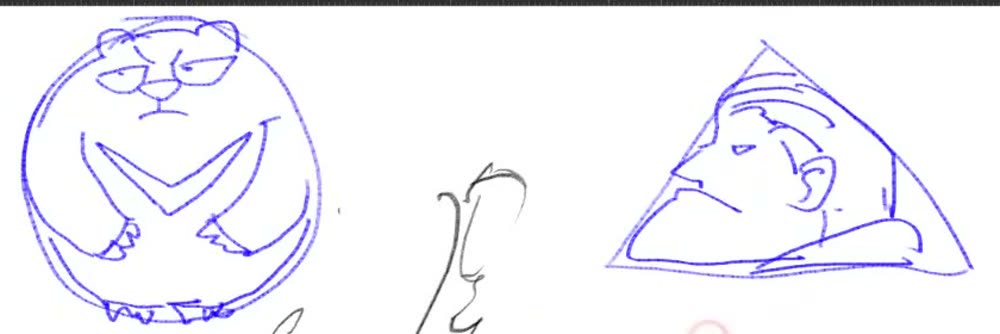
“You draw a shape first, then find a way to fill it in. … Find a way to put something, some content, inside, and it has to fit the circle and the triangle.”
He draws a circle and a triangle. The circle becomes a black bear: furrowed brows, crossed forearms making a big X across the body, small feet on the bottom edge. The triangle becomes an old man’s head in profile, his long chin running along the base.
Then a compound shape, standing in for another teacher’s exercise: a circle on a tall rectangle on a wide triangle. He turns it into a robot maid.
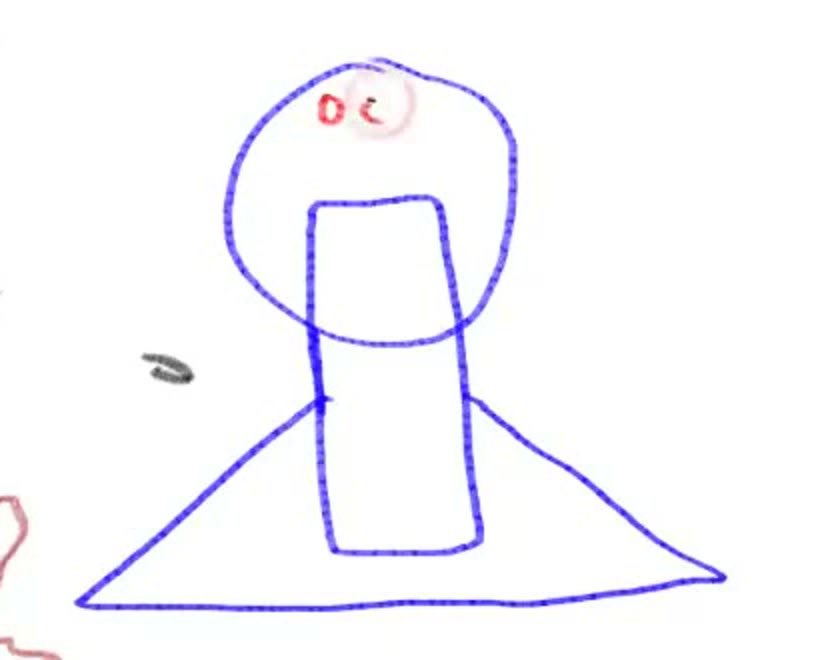
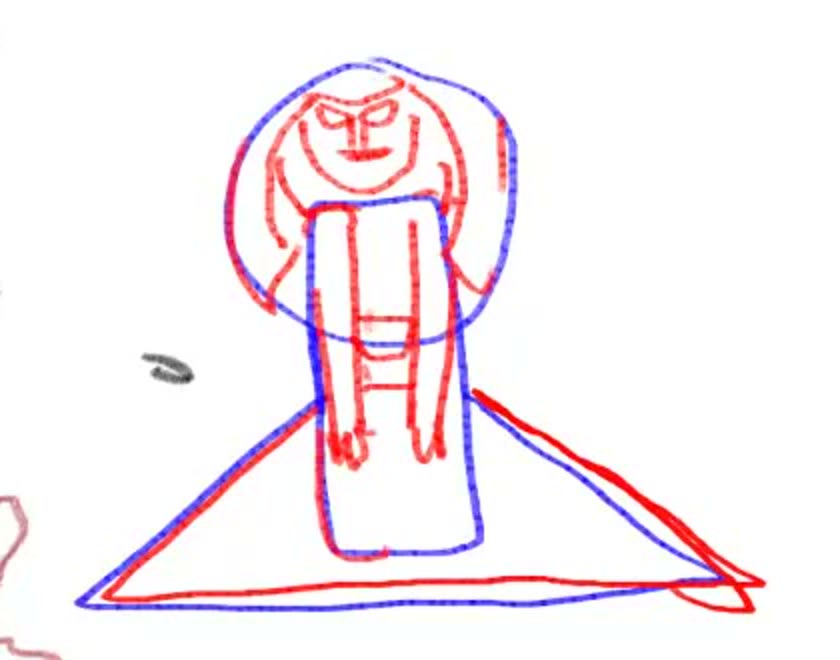
“Usually its proportions get distorted, and that distortion is very much personal style. … Out of this, a personal way of drawing things as symbols gradually forms.”
When you practise
- Draw a circle, a triangle, or a few shapes stacked together.
- Pick a subject: an animal, a person, a character.
- Fill the shape with it. Let the shape distort the proportions, and keep enough features to recognise it.
Check“It has to fit the circle and the triangle.” “I try to make this shape work.” (Krenz, 01:12:03, 01:13:38)
Fit a subject to a shape
Shape first → fill it with a subject → let it distort.
Keep asking: does it fit the shape?
Extract parts and recombine a motif
Take one ornamented object apart into pieces, then flip, overlap and rearrange them into something new: an emblem, a weapon, a shield.
Krenz · Recombination lecture · 0:01:45–0:07:50, 0:31:00–0:37:10
The problem after the study
Krenz · 0:02:06“I can copy this object, but I don’t know what to use it for next. … So what’s the next step?”
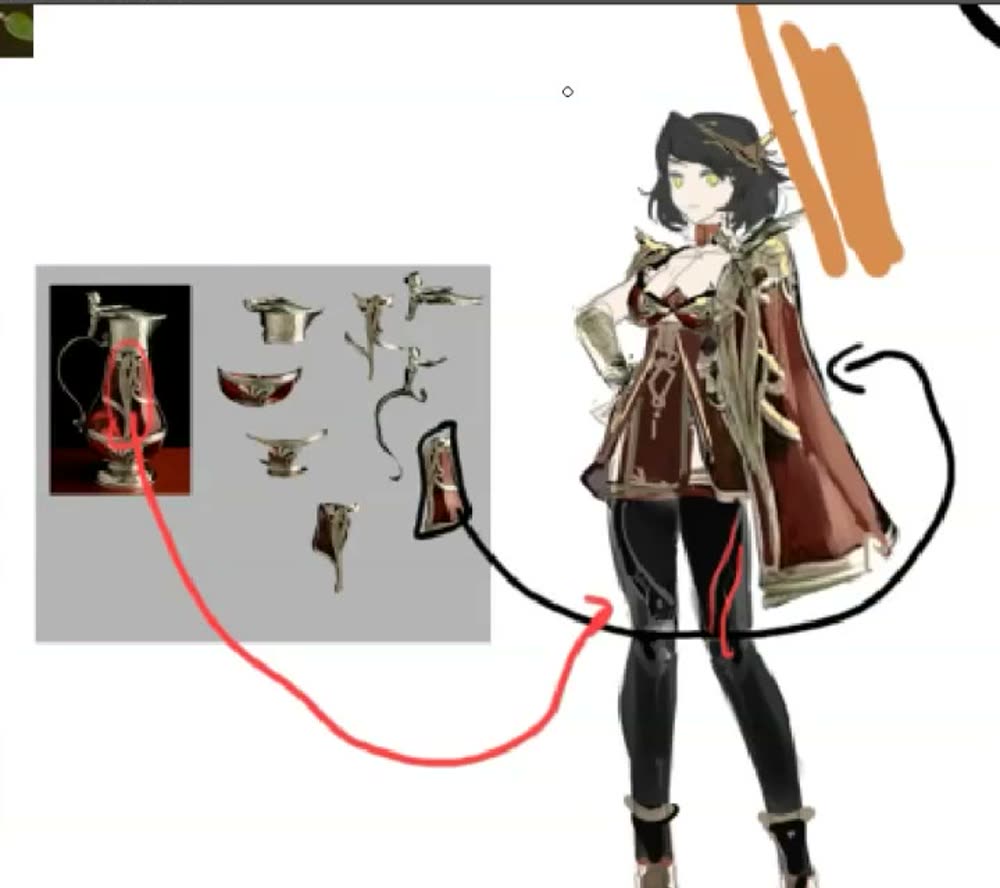
His source is a photo of a silver-mounted, lidded jug. He outlines regions to cut, both big blocks and smaller blocks inside them, and shows about ten parts already cut out from an earlier demo.
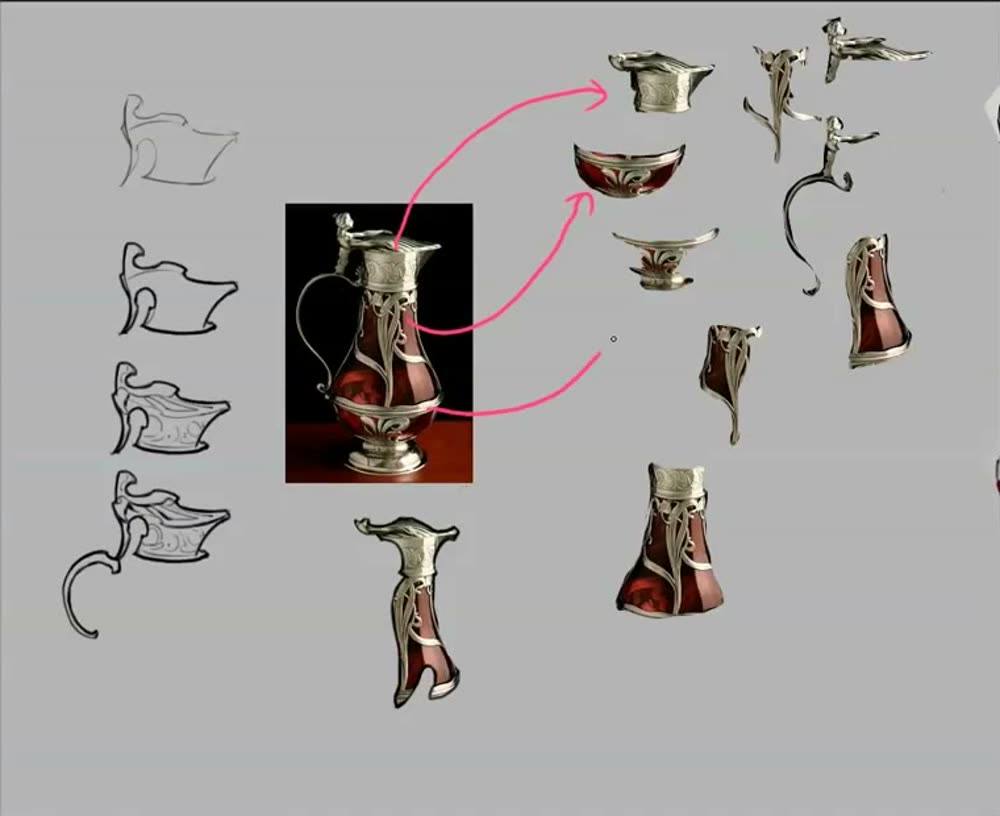
“Everyone cuts these shapes a bit differently, but mostly what we’re practising is seeing which shapes in here can be extracted. … When I extract its shapes, what matters is not matching the original, but getting the shape across.”
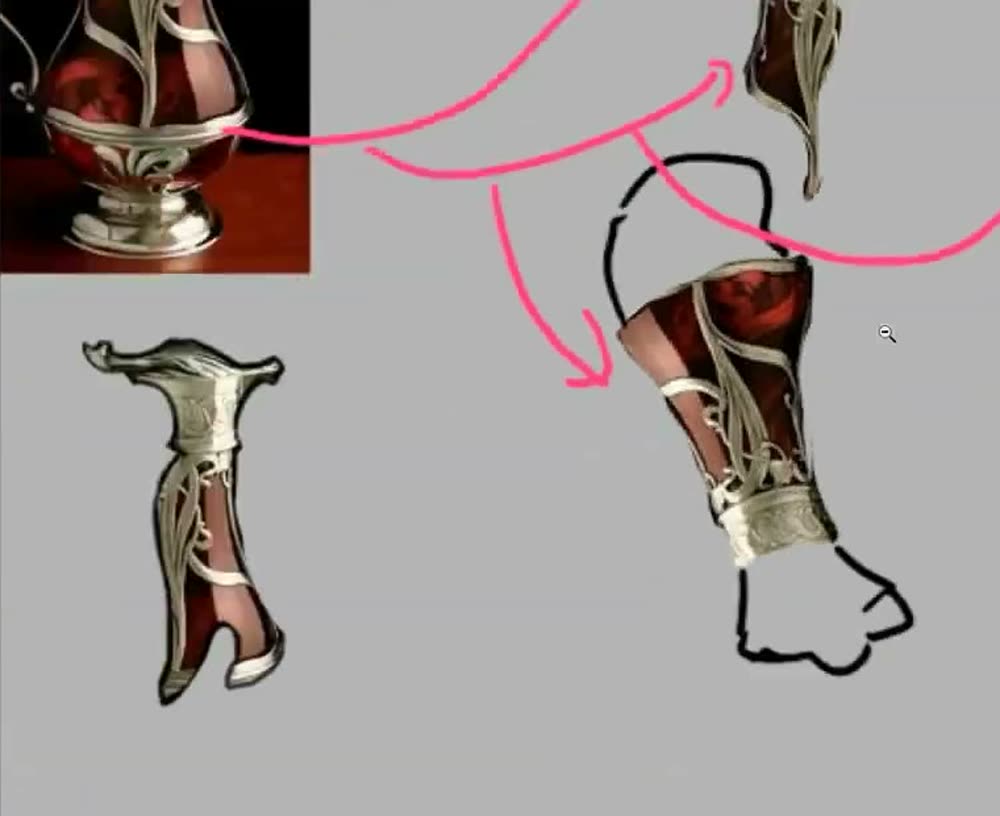
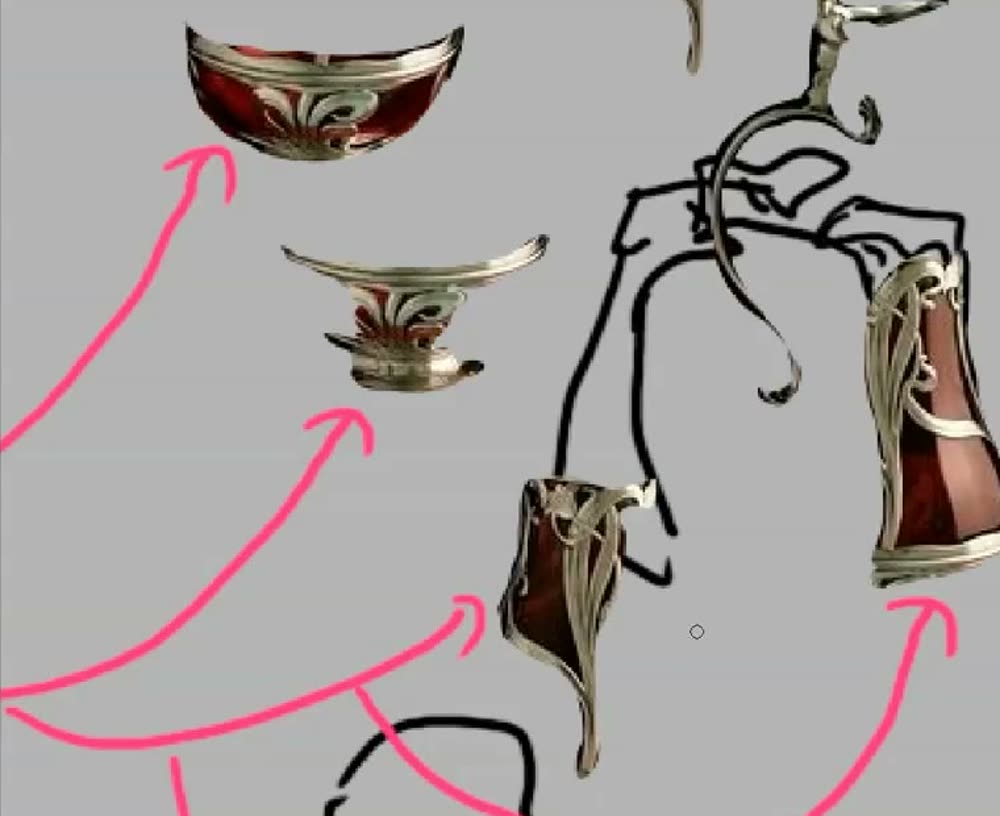
Once a part stands alone, it suggests new jobs. He rotates one over a drawn hand and it reads as a wrist cuff. Another hangs from a shoulder as a cape.
Start with an emblem, not a character
“Really, what you first need to be able to do is closer to making patterns or emblems. … With patterns and emblems, the easiest to start with are symmetrical ones.”
Live, he copies a part, mirrors it into a left-right pair, scales it, and puts another part in the centre: a winged emblem. He draws a pole and a blade, and it becomes a sword. Then an asymmetric version.
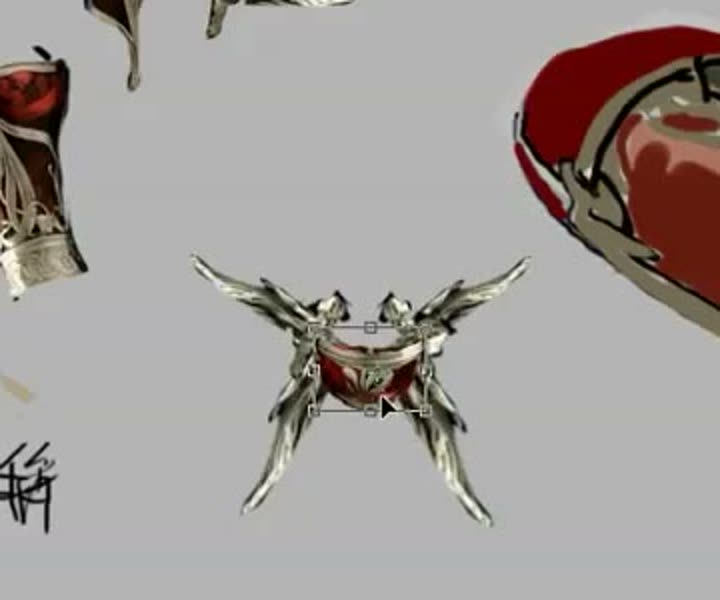
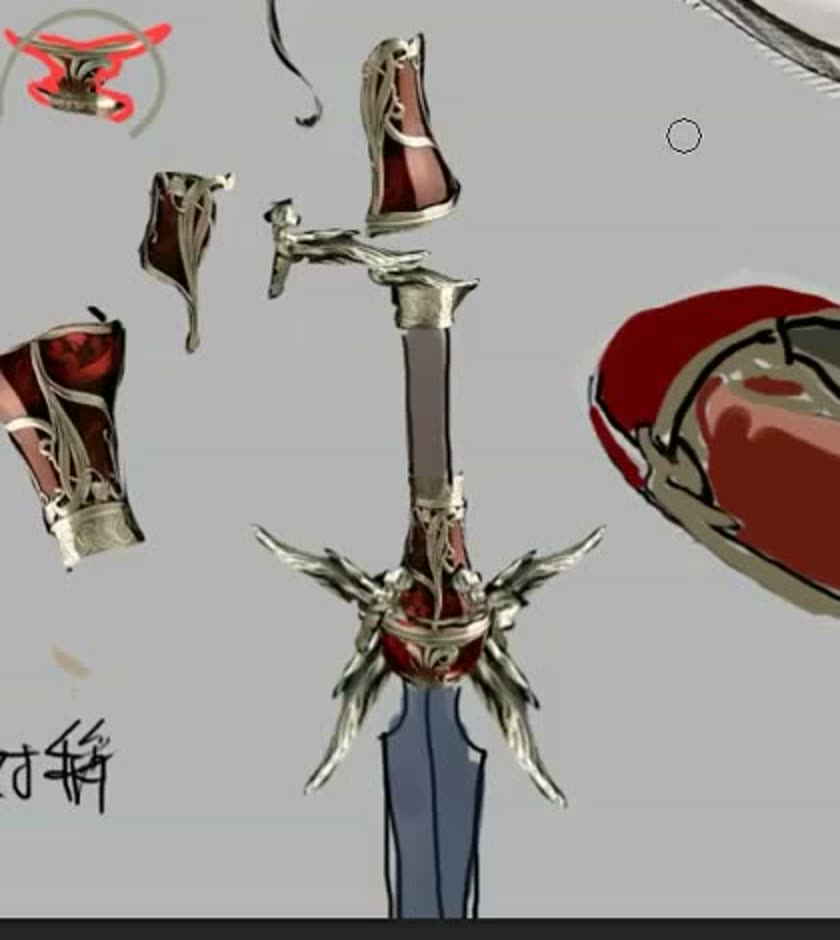
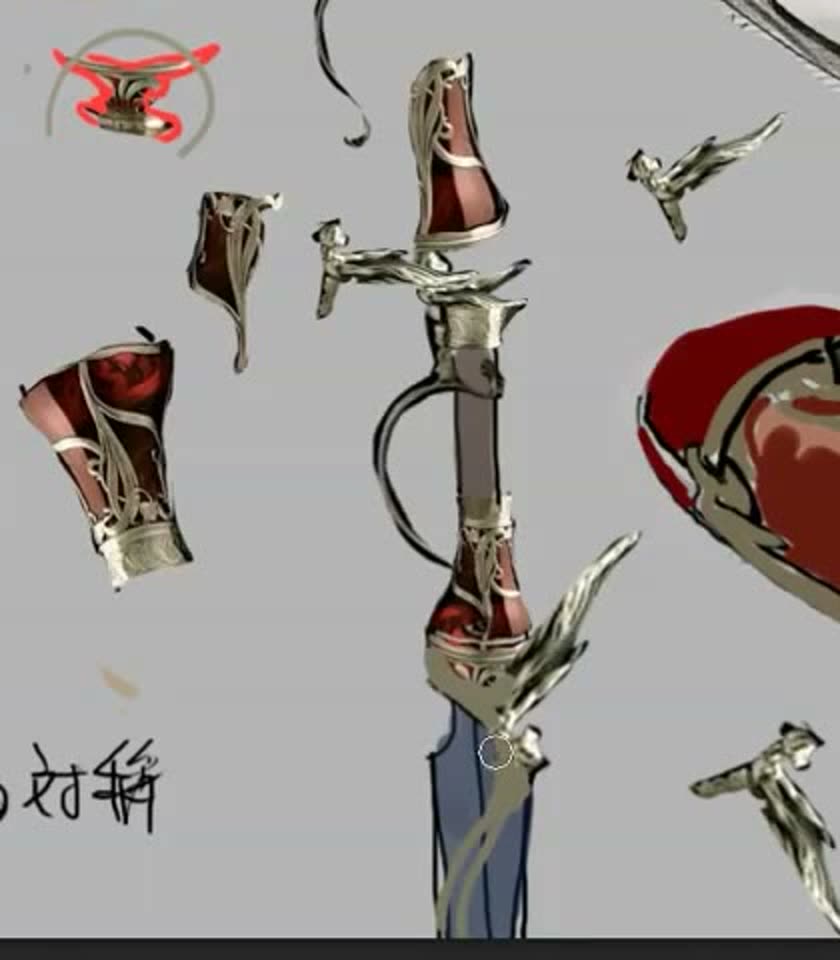
Krenz · 0:35:14“Recombine, flip, then overlap to find shapes.”
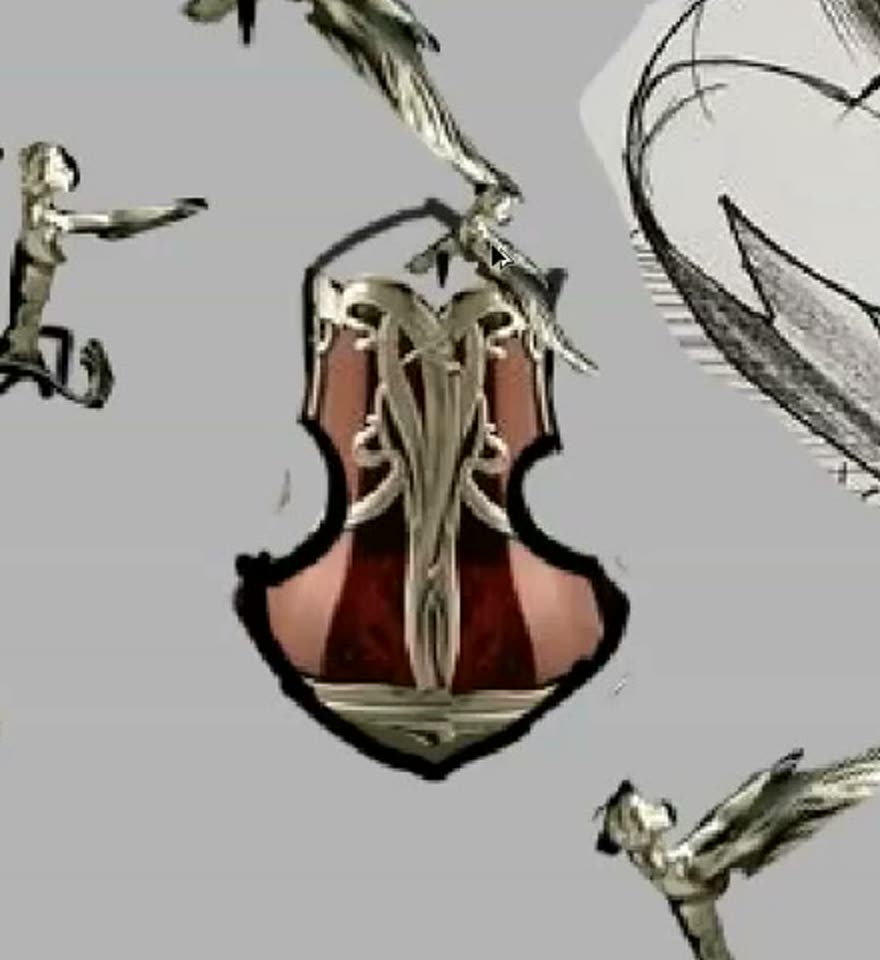
Then a shield: a jug part copied and flipped into a symmetrical shape, a thick drawn border, a hole cut with drawn lines, and a figurine part on top. Where parts don’t fit, he either lays one over and cuts out what he wants, or lines it up with the edge and adds strokes of his own.
When you practise
- Pick one ornamented object. He suggests crowns and jewellery.
- Cut out a handful of parts, some big and some small. Lasso and copy them onto their own layers.
- Copy and mirror parts into a symmetrical emblem. Scale and overlap them.
- Draw connections, or cut away what you don’t want. Let it become a weapon, a shield or a fitting.
- Try an asymmetric version.
Check“The idea of what you want this thing to look like comes through.” (Krenz, 0:36:35)
Extract and recombine
One object → cut parts → mirror into an emblem → connect or cut → new job.
Keep asking: which part do I take, which part do I join on?
Keep the silhouette, change the inside
Hold an outer shape fixed and change only its internal cuts and theme, so you can see what those two decisions do on their own.
Krenz · Recombination lecture · 0:08:12–0:27:42
Three decisions in any design
(1) The silhouette. (2) The internal cuts: where sleeves end, the neckline, panels, upper versus lower. (3) The theme: the common source the shapes come from.
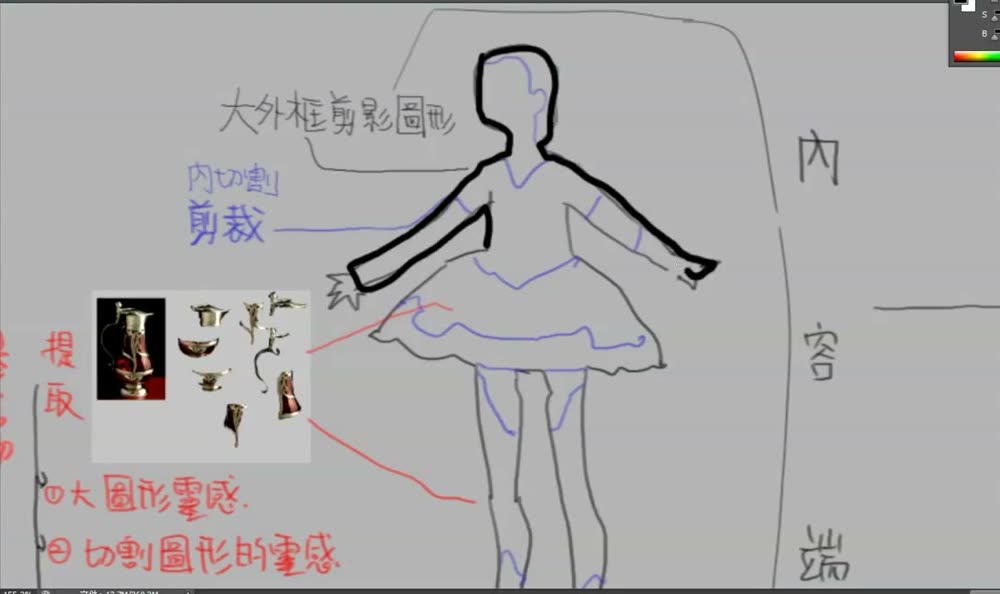
His counter-example is his own old habit: sporty stripes, classical carving, sci-fi lines and a flower, all on one outfit.
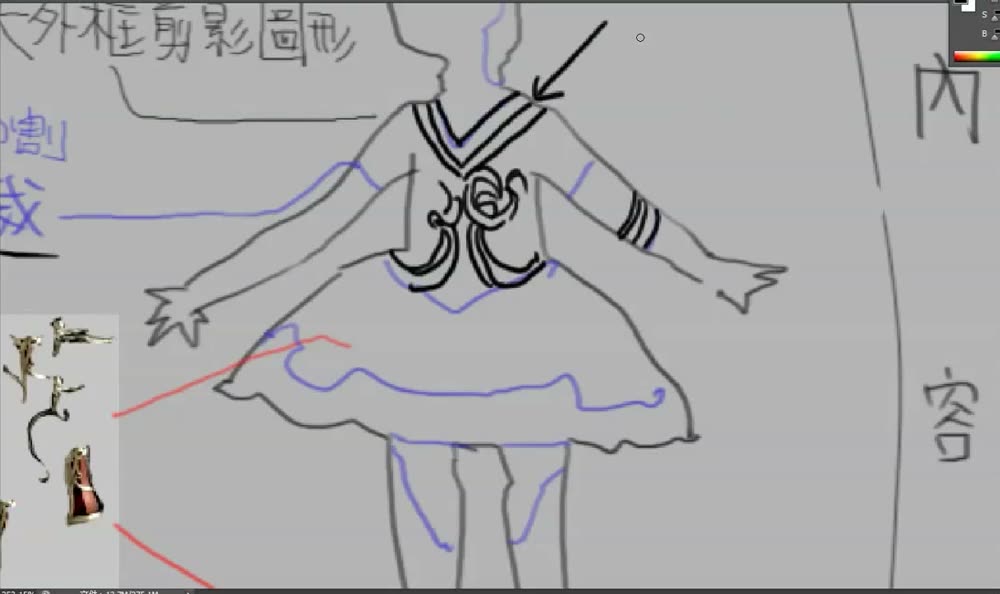
Krenz · 0:11:45“It’s called having no core attribute, or core theme.”
Fill in the blanks
A mouse already has a silhouette and regions: buttons, shell panels. He numbers them and fills them using only the jug’s parts. A high heel works the same way.
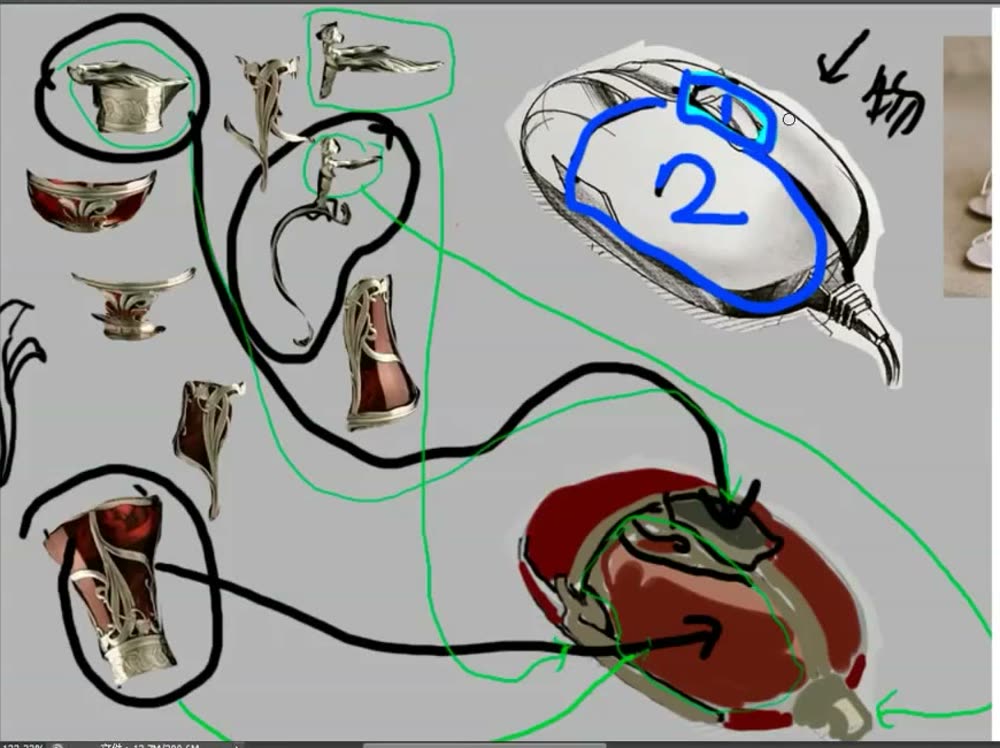
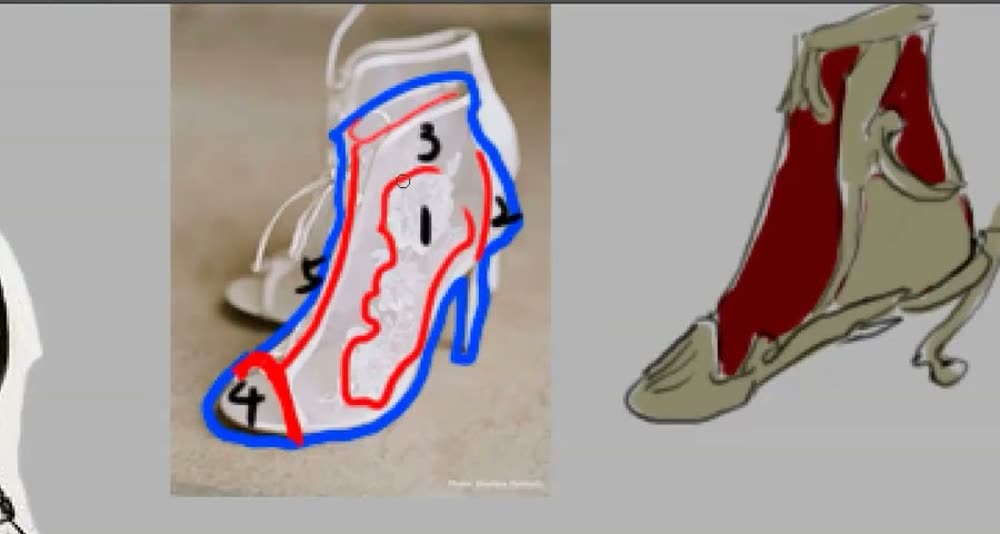
“What you’re doing is a bit like a fill-in-the-blanks question. … You use only the elements available here and fill in the content under constraint. … It’s not that it has to be one particular way to be right.”
Outfits, and moving pieces between them
He shows four jug-themed outfits he made earlier. Live, he moves the helmet from one to another, and combines a wing part with the helmet. He calls it permutation and combination.
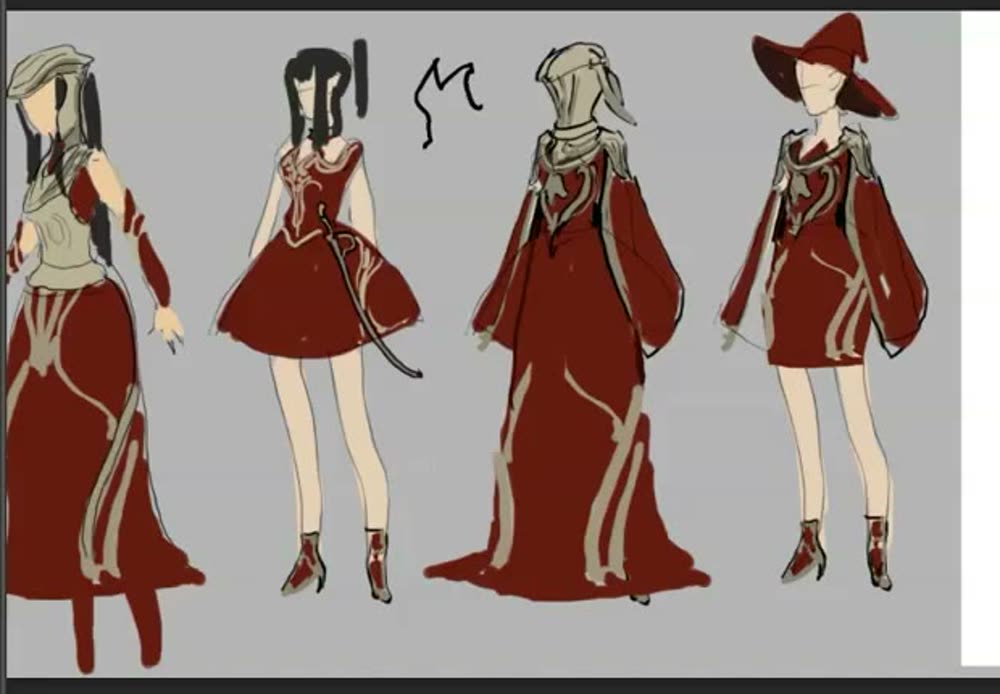
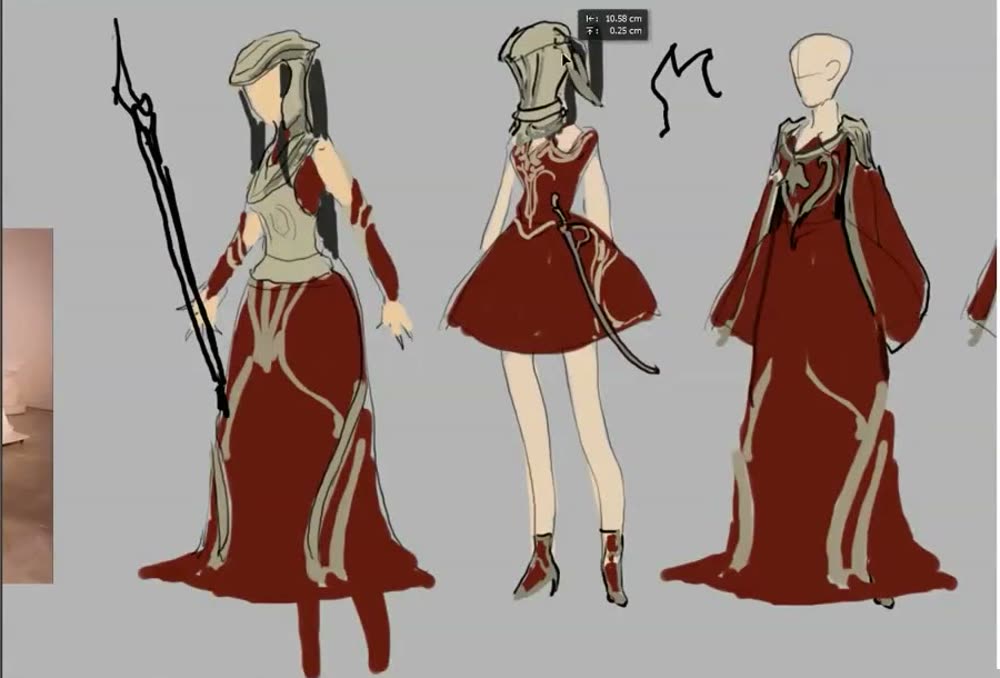
“It’s all extracted, under constraint, from one fixed object, so your elements don’t end up a mess. … In this training the core principle is that your elements should be fairly consistent.”
Same outfit, a different source
He outlines a bluebird’s wing pattern, then shows the same outfit themed on the bird: wing bands on the cape and sleeves, the head stripe moved to the hat.
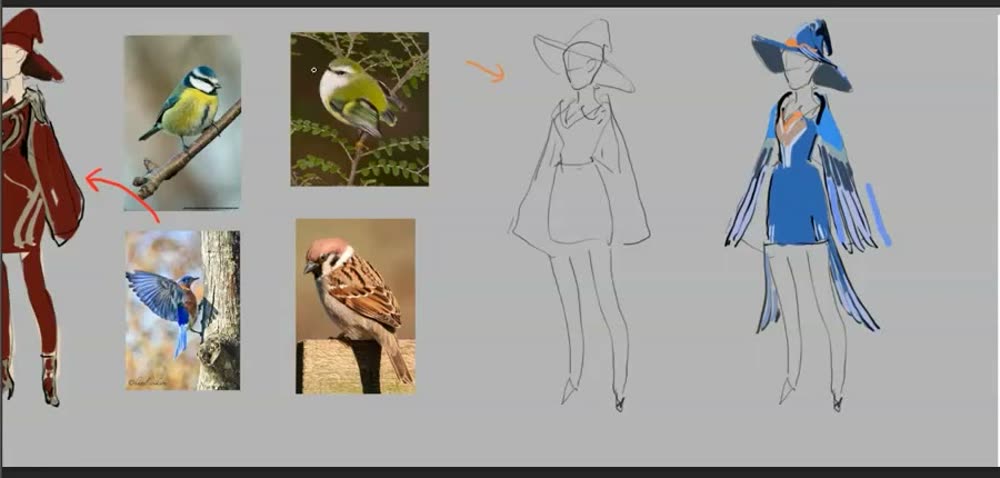
Krenz · 0:27:18“With the outer contour held fixed, how do you swap two and three? … The big shape stays, only two and three change. How do I replace them?”
When you practise
- Take a silhouette: a garment, an object, or one of your designs.
- Mark its internal regions and number them.
- Pick one source, an object or an animal. Fill the regions using only its elements.
- Keep the silhouette and do it again with a different source.
Check“Your elements should be fairly consistent.” It should read as one complete theme. (Krenz, 0:24:54, 0:26:50)
Keep the silhouette
Fixed outline → number the regions → fill from one source → swap the source.
Keep asking: with the outline fixed, how do I swap the cuts and theme?
Trace another artist’s transformation
Study a finished design by working out where each of its features came from in the source, and what was done to it.
Krenz · Recombination lecture · 0:27:49–0:30:56, 0:37:16–0:41:10
He opens another artist’s character, a blond king in a blue cape, with its source object: a jewelled egg-shaped ornament. He traces the ornament’s pattern to the cape lining. Then, live, he cuts off the ornament’s bottom, flips it, and puts it beside the crown.
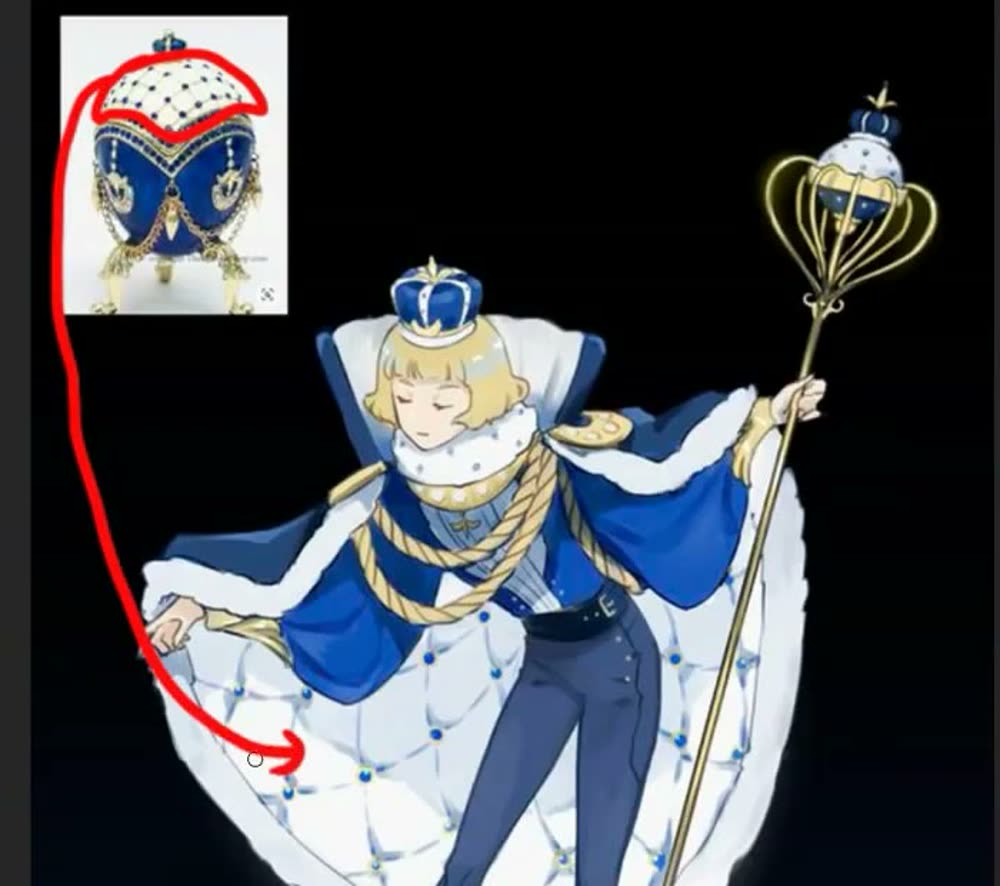
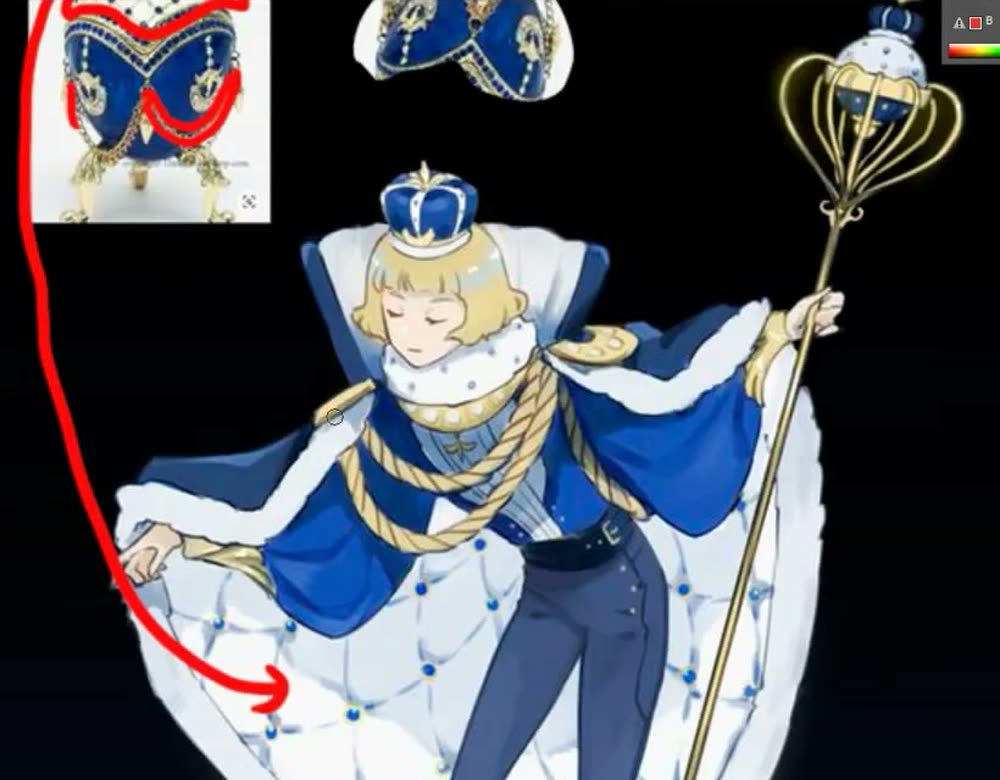
“Cut this bottom part off, flip it over, and it actually looks a lot like a crown. … Its elements are basically flipped out of this object, combined using horizontal flip, vertical flip, taking apart and recombining.”
“Finding shapes first needs awareness, and then enough examples to build it. … Which bit was extracted for the shoulder? Where did the cape come from? That’s what you need to look at.”
He does the same with his teaching assistant’s design, tracing a jug part to the cape and the jug’s pattern to the stockings.
The advanced version
Some artists use the source to change the silhouette itself: a part enlarged into floating equipment, or a ring around the figure. He demonstrates it quickly, and says it isn’t his strength.
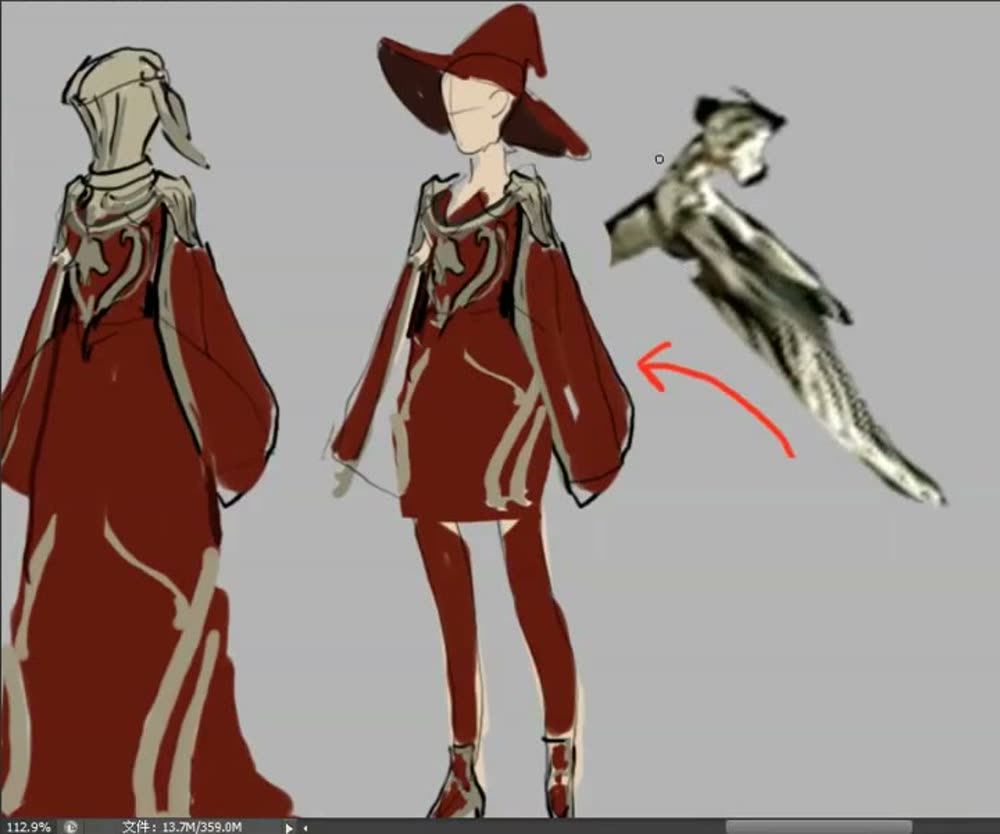
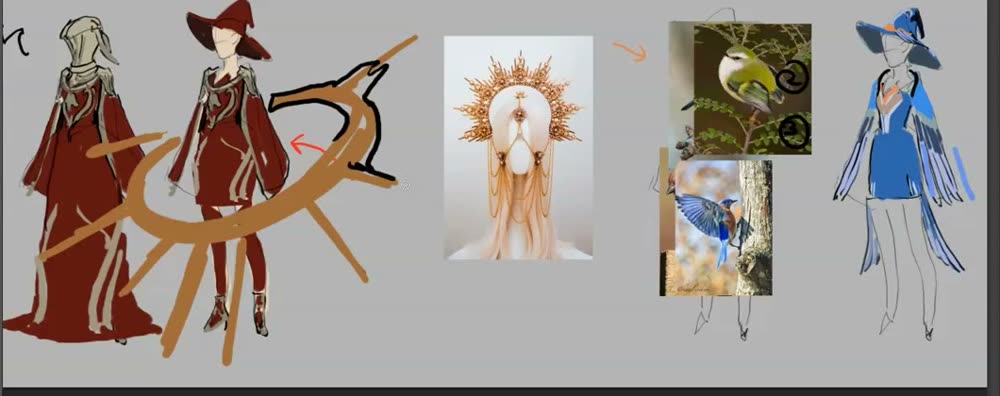
Krenz · 0:40:45“They find silhouette ideas directly in the object. But that’s more advanced. I’m not that good at it myself.”
When you practise
- Find a design where you can see or guess the source: a character based on an object, an animal or a theme.
- For each feature, ask which part of the source it came from.
- Note what was done to it: flipped, scaled, cut, given a new job.
- If you like, try one of those moves yourself on the source.
CheckCan you say where each feature came from? (Krenz, 0:29:59)
Trace a transformation
Design + source → feature by feature → what was done to it.
Keep asking: where did this part come from?
Character design from a brief
Design a character from a brief that combines an animal with a human role and personality. Recruit the animal’s own features to stand for human ones, then push the proportions.
Krenz · Shape lecture · 01:14:51–01:19:19
“Here’s an example that comes up a lot: if you had to draw a lead like this yourself, you’d get stuck. … A rooster who works on Wall Street, an elite white-collar securities executive. A highly paid man with taste, usually goes to work in a suit. And he often looks down on people.”
The animal’s features become the human ones
The comb becomes a swept-back quiff. The wattle under the beak becomes a beard. The eye narrows into a sneer. The body is in a graduation gown, a wing-hand holding a folder.
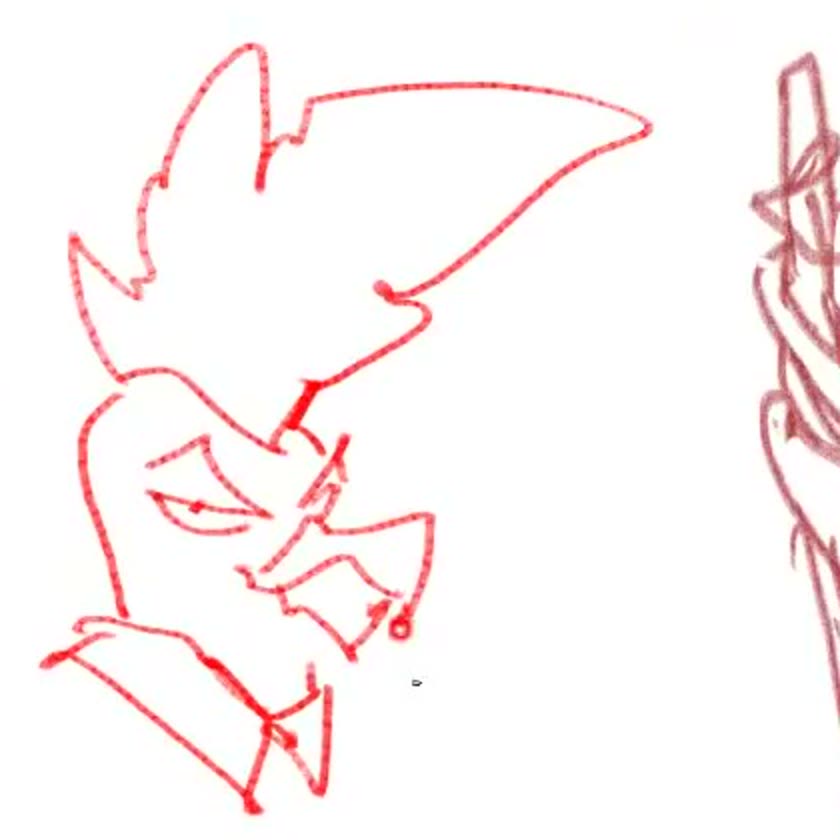
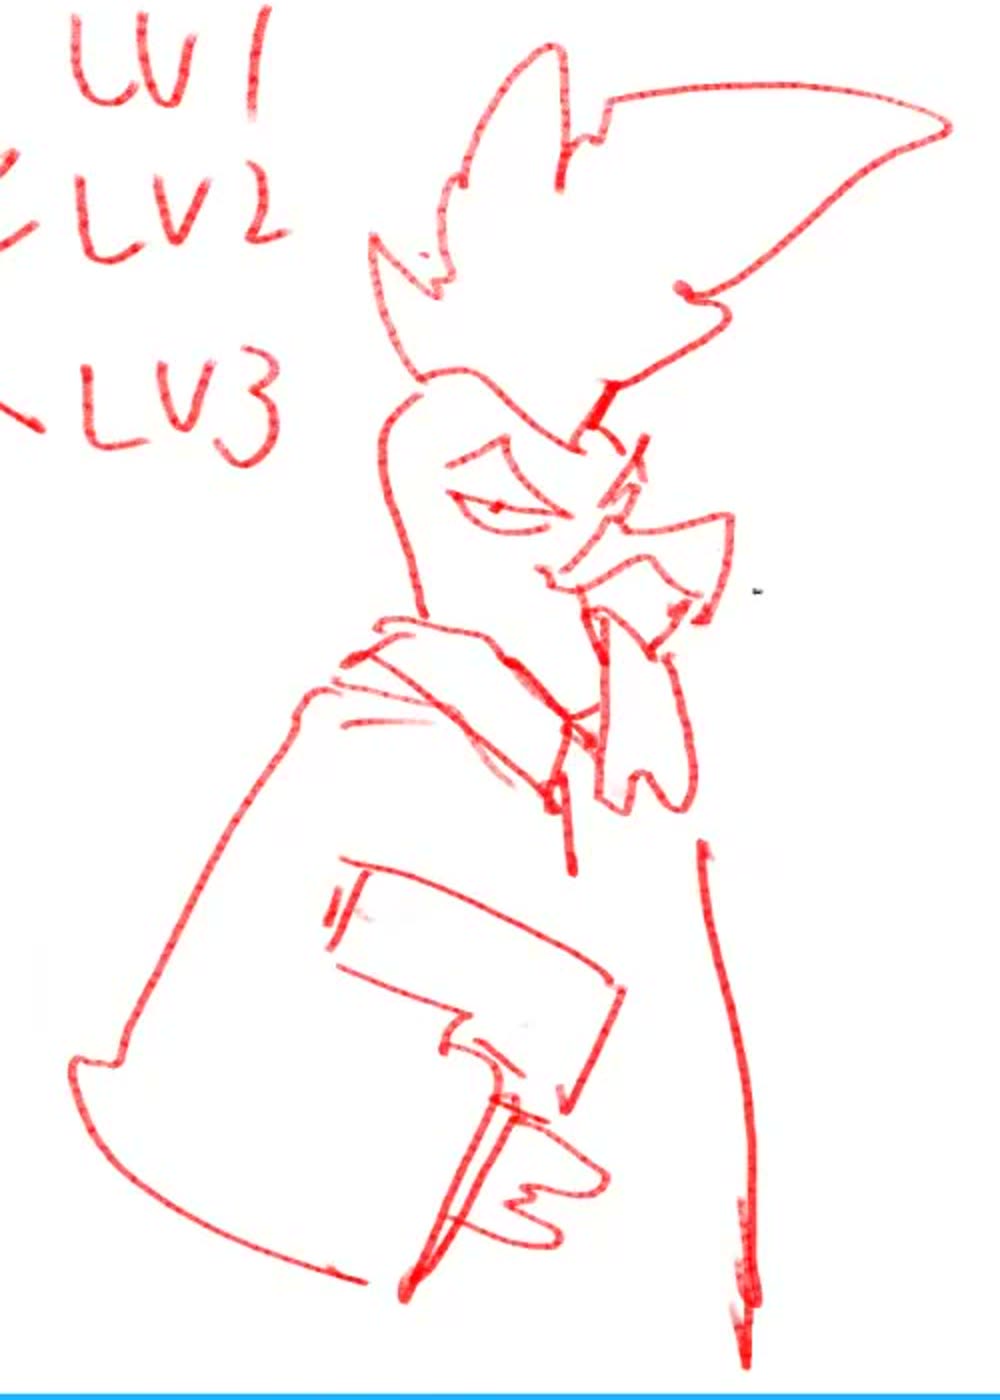
Krenz · 01:15:35“They might use the comb’s shape to stand for a hairstyle, making their own symbol, simplifying it themselves … and use this part underneath to stand for a beard or something.”
Once he’s an office worker, Krenz erases the big comb, redraws it as slicked-back hair, and adds small glasses.
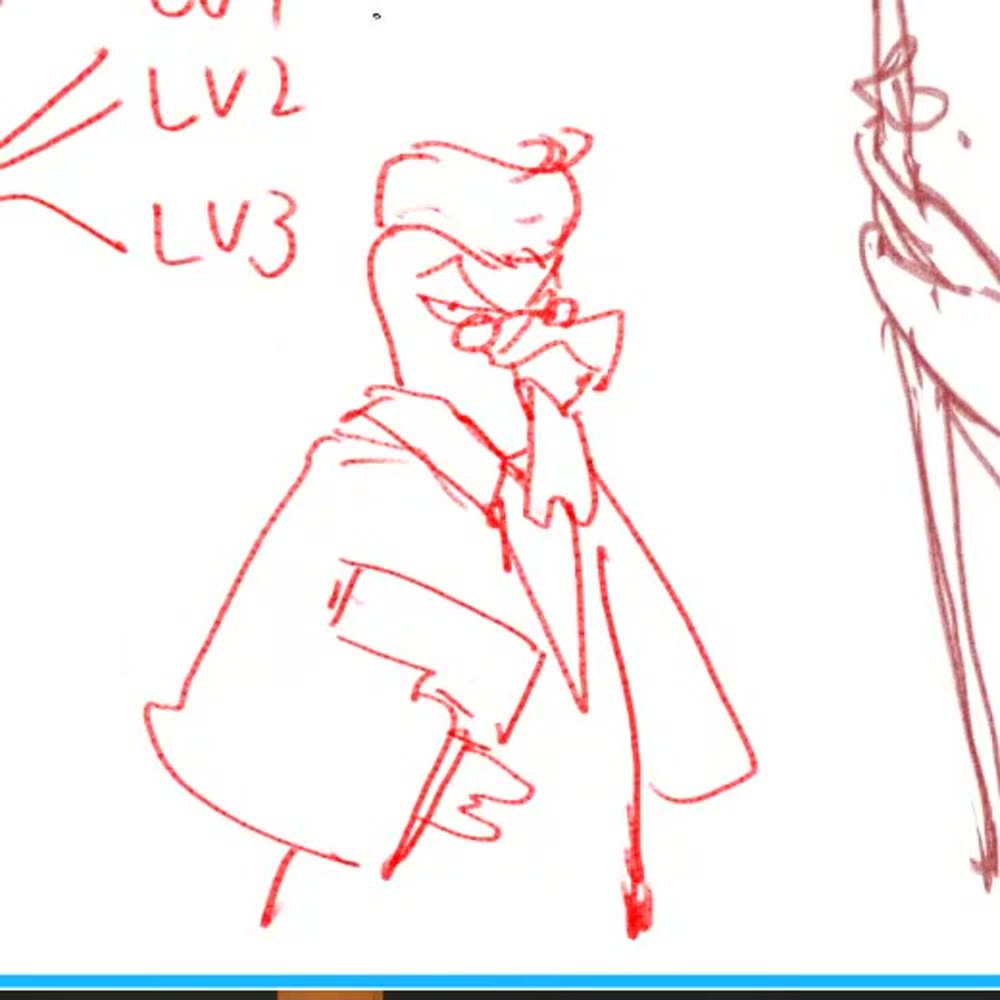
Push the proportions
“A few years later he’s become this.” He draws a second version, then lassos the body without the head and scales it much wider, giving a big round torso under a small head.
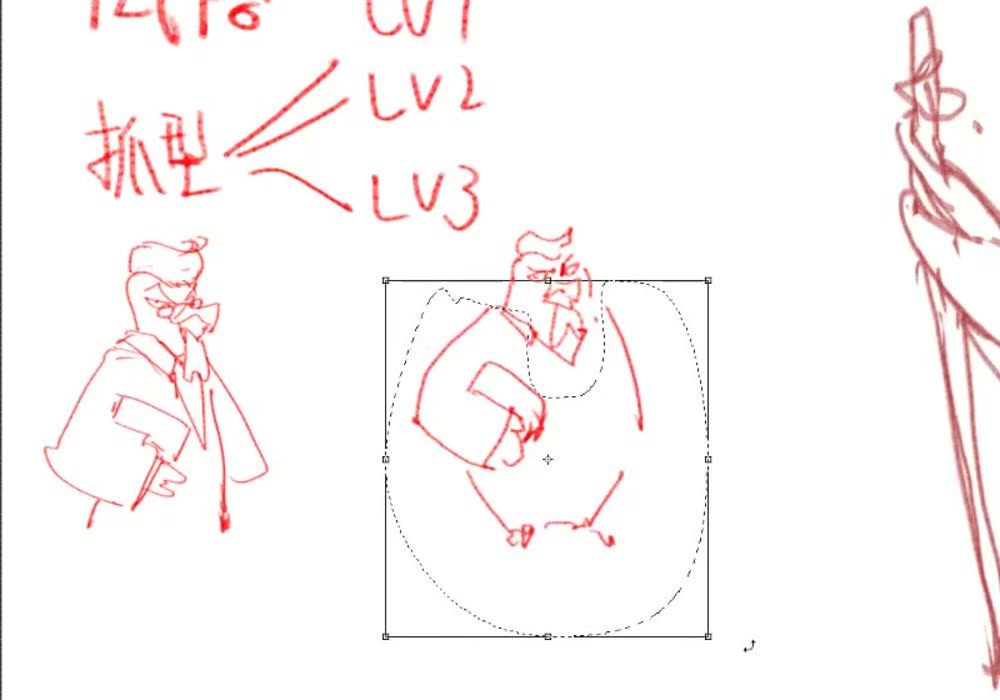
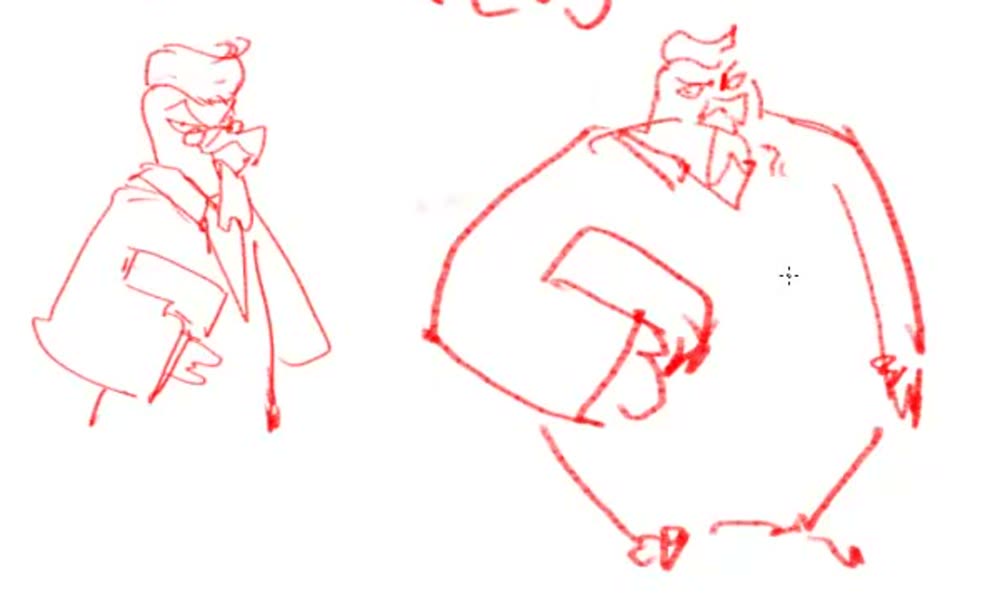
“Or we take the proportional relationships here and strengthen and exaggerate them. … Make the proportions wider, narrower, thinner, longer.”
Krenz · 01:16:29“Drawing anime girls, you’d normally never practise this.”
When you practise
This is a longer assignment: a design session, not a quick drill.
- Write a one-line brief: an animal, a job or role, and a personality.
- Draw the head. Recruit the animal’s own features to stand for human ones: hair, beard, accessories.
- Add body and costume for the role.
- Make a second version with pushed proportions. Lasso and transform parts wider, narrower, thinner or longer.
CheckNone stated. He frames this as the challenge you meet after copying, on the creation side (01:18:35).
Character from a brief
Animal + role + personality → its features become human ones → push the proportions.
Keep asking: which of the animal’s features can stand for this?